Working Wet on Wet
Working Wet on Wet with Watercolour Paints
Working wet on wet in watercolour seems to trouble a lot of beginner painters. Below are some common questions I am often asked:
How do you determine how much water to have on your brush or paper?
How much water is too much?
When working wet on wet how can I control how far and how uniformly pigment flows away from my brush?
I find wet on wet to be a challenge. I almost always end up with ugly blooms. How do you avoid them?
My paper is drying too quickly - please help?
Alrighty, let’s see if I can help.
How do you determine how much water to have on your brush or paper?
Well… that depends on what you are trying to do.
At the start of the painting you might have more water on your paper than you do during the middle and final stages when you are adding all of the gorgeous detail.
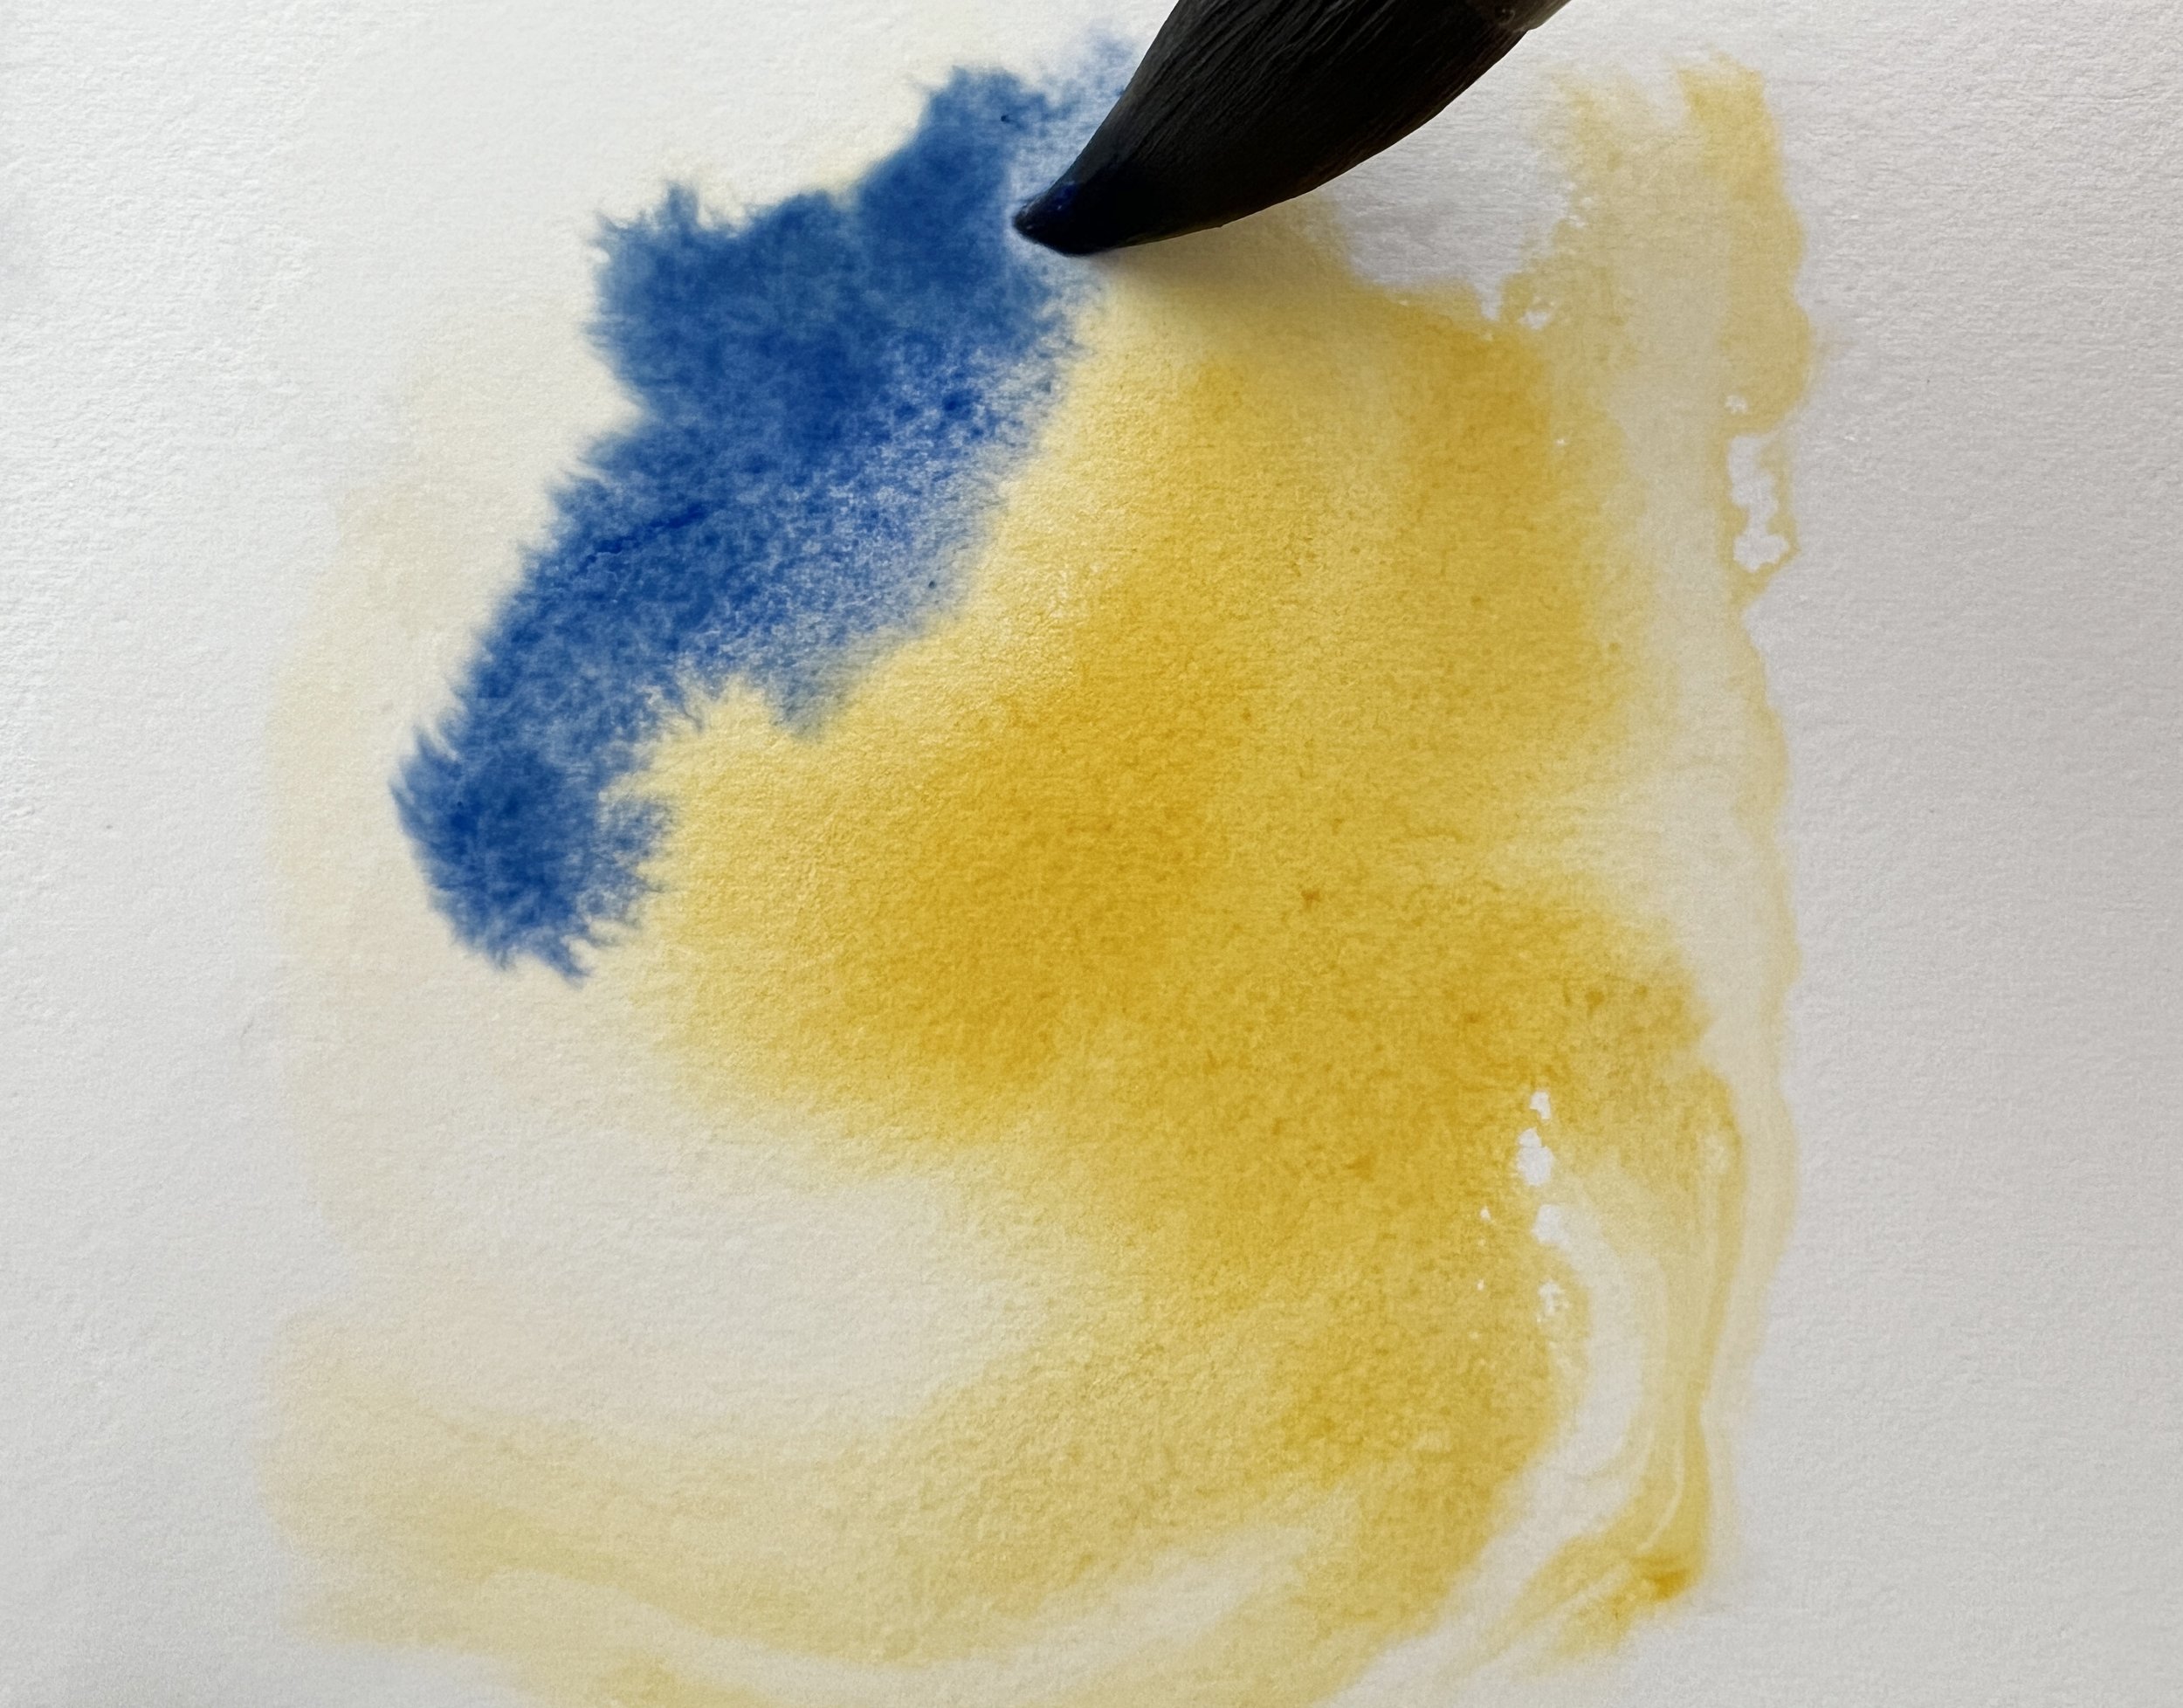
When I first start a painting I work wet on wet and the wet paper looks like a plump, juicy orange just after I have sliced it open. It glistens and it eagerly waits for me to drop some paint onto it so that the paint and water can do their well-rehearsed shimmy together.
On that wet glistening paper I lay in my first washes. They are always light in colour so my paint also has water mixed into it. If I lift my palette off the table, the paint will pool on one side of my puddle.
My brush is wet but it’s not dripping wet like a soggy sponge. Instead, it’s ready to create some magic on the page. In fact all the way through the painting my brush is wet, unless I’m going to do some dry brushing and then it is damp.
As I begin to work darker tones onto my painting I might re-wet some areas of the paper if it has dried and I usually want the paper to be the same wetness that it was when I started (juicy like an orange… remember?) but now my paint might be slightly thicker. The paint will still move on the palette when I lift it but not quite as much as it moved when I was painting those first washes.
When I begin to add details I might re-wet the paper again but this time I might wait a little while until the water has started to soak in. The paper will still have a sheen but it’s not glistening like an orange it’s more like a set of smooth and luxurious satin sheets waiting patiently for the pigment to slide on in.
My paint might be thicker too. When I paint with the thicker paint on damp paper, the paint behaves and stays put. Because the paper is damp I still get those fuzzy edges on marks that I make but it’s more obedient than it was on the glistening wet paper.
The amount of water you use on your paper changes as you progress through your painting. Starting with more water at the beginning, and using less as you add details. It's a balancing act between pigment and water, finding the sweet spot where the colours blend and flow, but don't become too diluted. With practice, you'll learn how much water your paper can handle, and your paintings will reflect your mastery of this delicate technique. I wrote ‘with practice’ in bold because it’s that important. You must practice! I’m still learning to paint in watercolour after 12 long years.
Be patient.
How much water is too much?
Again - it depends what you want to do.
One thing I see is beginners not using enough water.
Their finished paintings tend to lack that freshness that watercolour paintings should have. They might look laboured and overworked because they haven’t allowed the paint and water to dance over the paper.
Watercolour is the medium of light.
It’s fresh, it’s fluid… it’s juicy!
After I have wet my paper I look for big puddles sitting above the surface. If I see any I’ll use my brush to sop them up. I want it to be wet but I don’t want to go for a swim in it.
When I put the paint on the paper I don’t want it to sit above the paper floating in a puddle of water. I want it to start soaking in straight away.
When working wet on wet how can I control how far and how uniformly pigment flows away from my brush?
If your paper is quite wet - you can’t really control the pigment and why would you want to?
Instead of trying to control it, let go and allow the water and pigment to dance together. Let them show you how beautiful they can tango.
You will be amazed at what they can do!
If you find that… eeek… it’s gone over there and I really didn’t want it to……use your clean damp brush to sop up some of the paint and push the paint where you want it to sit. Use a tissue if you have to. Gently dab. But… and I have learnt this the hard way… if you are going to tidy things up, do it sparingly. It’s much better to leave it alone and accept what it has given you.
If you do want a bit more control then give the water on the paper a chance to soak in a little so that it looks like those satin sheets rather than that juicy orange and then try painting on it. Make your paint a bit thicker too.
I find wet on wet to be a challenge. I almost always end up with ugly blooms. How do you avoid them?
Oh those ugly blooms!
I happen to love them.
Blooms, cauliflowers, wash backs… whatever you call them… I create them deliberately to add texture and interest to my paintings.
But there are times when you really don’t want them. It might be on a sky or perhaps a portrait that you’re painting.
They occur when your paint is beginning to dry and then some water rushes in from a surrounding area (or from your brush) and it disturbs the drying pigment.
So, the way to avoid them is to watch the wetness of your paper. If you see it starting to dry (the sheen is diminishing) you might want to keep excess water or watery paint away from that area.
If you need to do some work near the drying area (maybe you want to soften a paint edge) make sure the wetness of your brush is similar to the wetness of the paper. What I mean is…….don’t use a drippy wet brush near paint that is drying. Use a dryer brush. Don’t add any more water to the paper in that area.
See my video here about watercolour blooms.
And finally…
My paper is drying too quickly - please help?
If I had a dollar for every time someone has mentioned that their paper dries too quickly I’d be sipping margaritas on a beach in Cancun, while my husband catered to my every need.
I know, I get it, it happens to me too. The paper starts to dry before you get everything done. It’s so annoying!
Here’s a few things you can try.
Work on smaller areas at a time. This will give you more control over the drying process and allow you to work at a more manageable pace.
Wet past the area where you want to work because you don’t want the paint to drift to the edge of the water creating hard edges where you don’t want them.
Work in that smaller wet area and when you’re finished, if you find the paper is still wet, then wet the next section and keep working.
If the paper is starting to dry - wait!
Wait until it is almost dry and then dry it completely with a hair dryer. Then re-wet the next small section and keep going.
When I wet a large area of the paper, by the time I’ve finished wetting that area, the first section I started to wet is less wet than the section I just finished wetting. Get me?
So, I go back to the first section of the paper that I wet and I wet it again. That way the whole section I just wet is uniformly wet all over. (That was a lot of sections!)
If you live in an area of low humidity (lucky you) you might find that a blending medium may help extend the drying time of your paint. I’ve never used blending mediums so I can’t tell you about their effectiveness but they might be worth a try.
One thing I want you to be shore about (excuse the water pun)… water is a crucial component of painting in watercolour. But you know that right?
So water you waiting for? Get your paints out and dive in… (Too much???)
Drowning you in water tips here:
I have a tutorial on Patreon where I focus on the wet on wet technique. I provide some simple exercises that you can practice.


