Painting Glass in Watercolour

'Floating Memories' watercolour painting

Creating the illusion of glass in watercolour can be a captivating challenge, and capturing the delicate beauty of a camellia floating in a crystal bowl brings an extra layer of nostalgia and sentiment to the process.
This still life watercolour painting holds a special place in my heart because it reminds me of my nanna. She used to gather fallen camellias from her garden and place them in a beautiful glass bowl filled with water, letting them float gracefully in the centre of the table.
I have a camellia tree, and as I was taking photos of the blossoms to use as painting references, one of them fell to the ground. This instantly brought back memories of what my nanna used to do, inspiring me to create this painting.
In this blog post, I will guide you through the techniques and steps I used to paint glass in watercolour.
Watercolour Paper
I used Fabriano Artistico soft press paper for this painting. I chose soft press paper because it allows for capturing intricate details more easily than cold press paper. The texture of soft press paper falls between cold press and hot press; it has a bit of texture but is not as rough as cold press nor as smooth as hot press. Unfortunately, it's becoming harder to find here in Australia. The last time I tried to order it, the supplier informed me they couldn't get it anymore, which is a shame because it's a beautiful paper to paint on. The only issue I had with it was that lifting watercolour paint after it has dried is more challenging compared to other papers. As well as that, it is slightly more fragile than the Arches paper I normally like to use.
I painted on Fabriano Artistico watercolour paper.
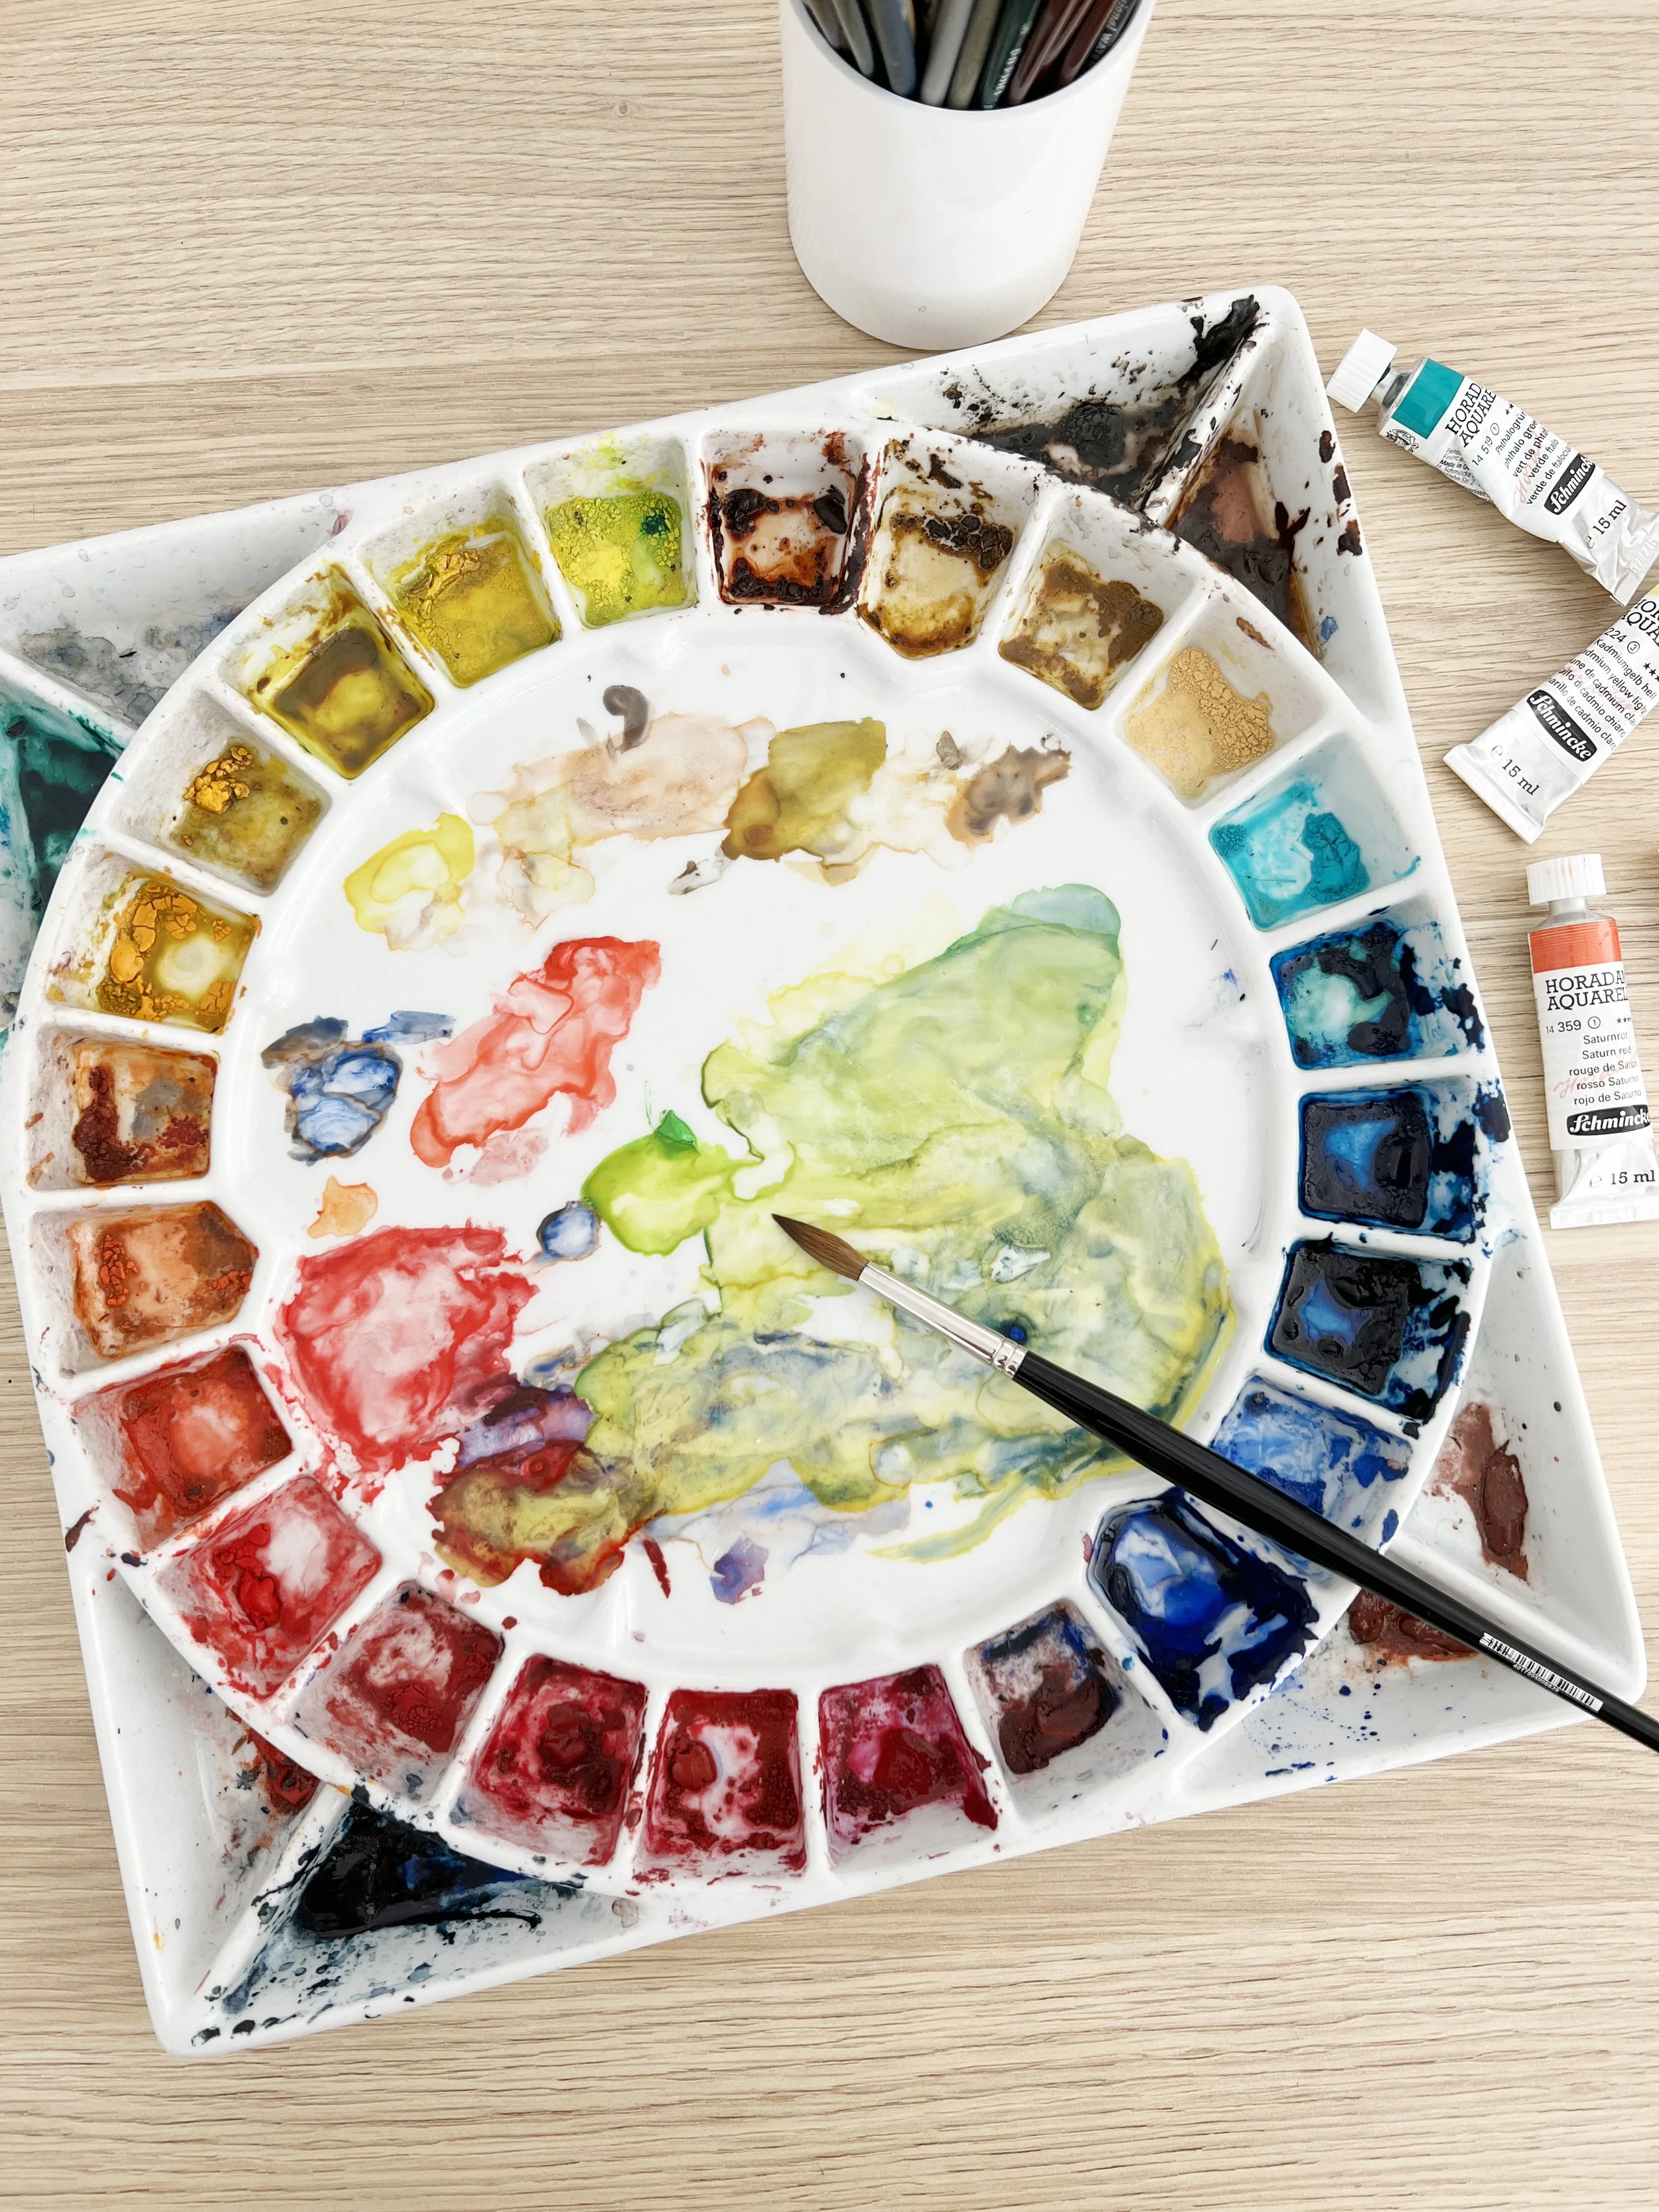
Watercolour Paints: The colours I used.
For this painting, I used more colours than I typically prefer. I usually aim for a limited palette to maintain colour harmony, but I think it still turned out beautifully.
I used Winsor & Newton watercolour paints, including French Ultramarine (PB29), Burnt Sienna (PR101), Winsor Red (PR254), Permanent Rose (PV19), Winsor Yellow (PY154), Indian Yellow (PO62 - PY139), and Winsor Blue Green Shade (PB15).

The colours I used on my palette
Setting up the Still Life

My still life set up inside the studio
I wanted to work from a photograph because I wasn't sure how long it would take me to finish the painting. Since I often have to leave a painting for a week or more to complete other jobs, I knew a photograph would be necessary. I set the bowl on a piece of white card against a white wall in the studio, turned on a light, and took some photos.
Then, I decided to take some photos outside in the sun to achieve greater contrast. I took the white base card and a gator board for the background and propped the gator board up against a stool outside the studio in the sunlight.
I decided to use one of the photos I took outside because the better contrast and interesting cast shadow shapes made for a more interesting composition.

My still life set up outside the studio in the sun.
Step by Step Glass Watercolour Painting Process
The first thing I did was mix my favourite grey using French Ultramarine and Burnt Sienna.
I love using these two colours because I am familiar with them and they are easy to mix. I can adjust the temperature of the grey by adding more French Ultramarine for a cooler grey or more Burnt Sienna for a warmer grey. The grey produced from these two colours is always beautiful and I love the effect of the slight colour separation when I paint on wet paper.

Mixing Burnt Sienna with French Ultramarine to make grey
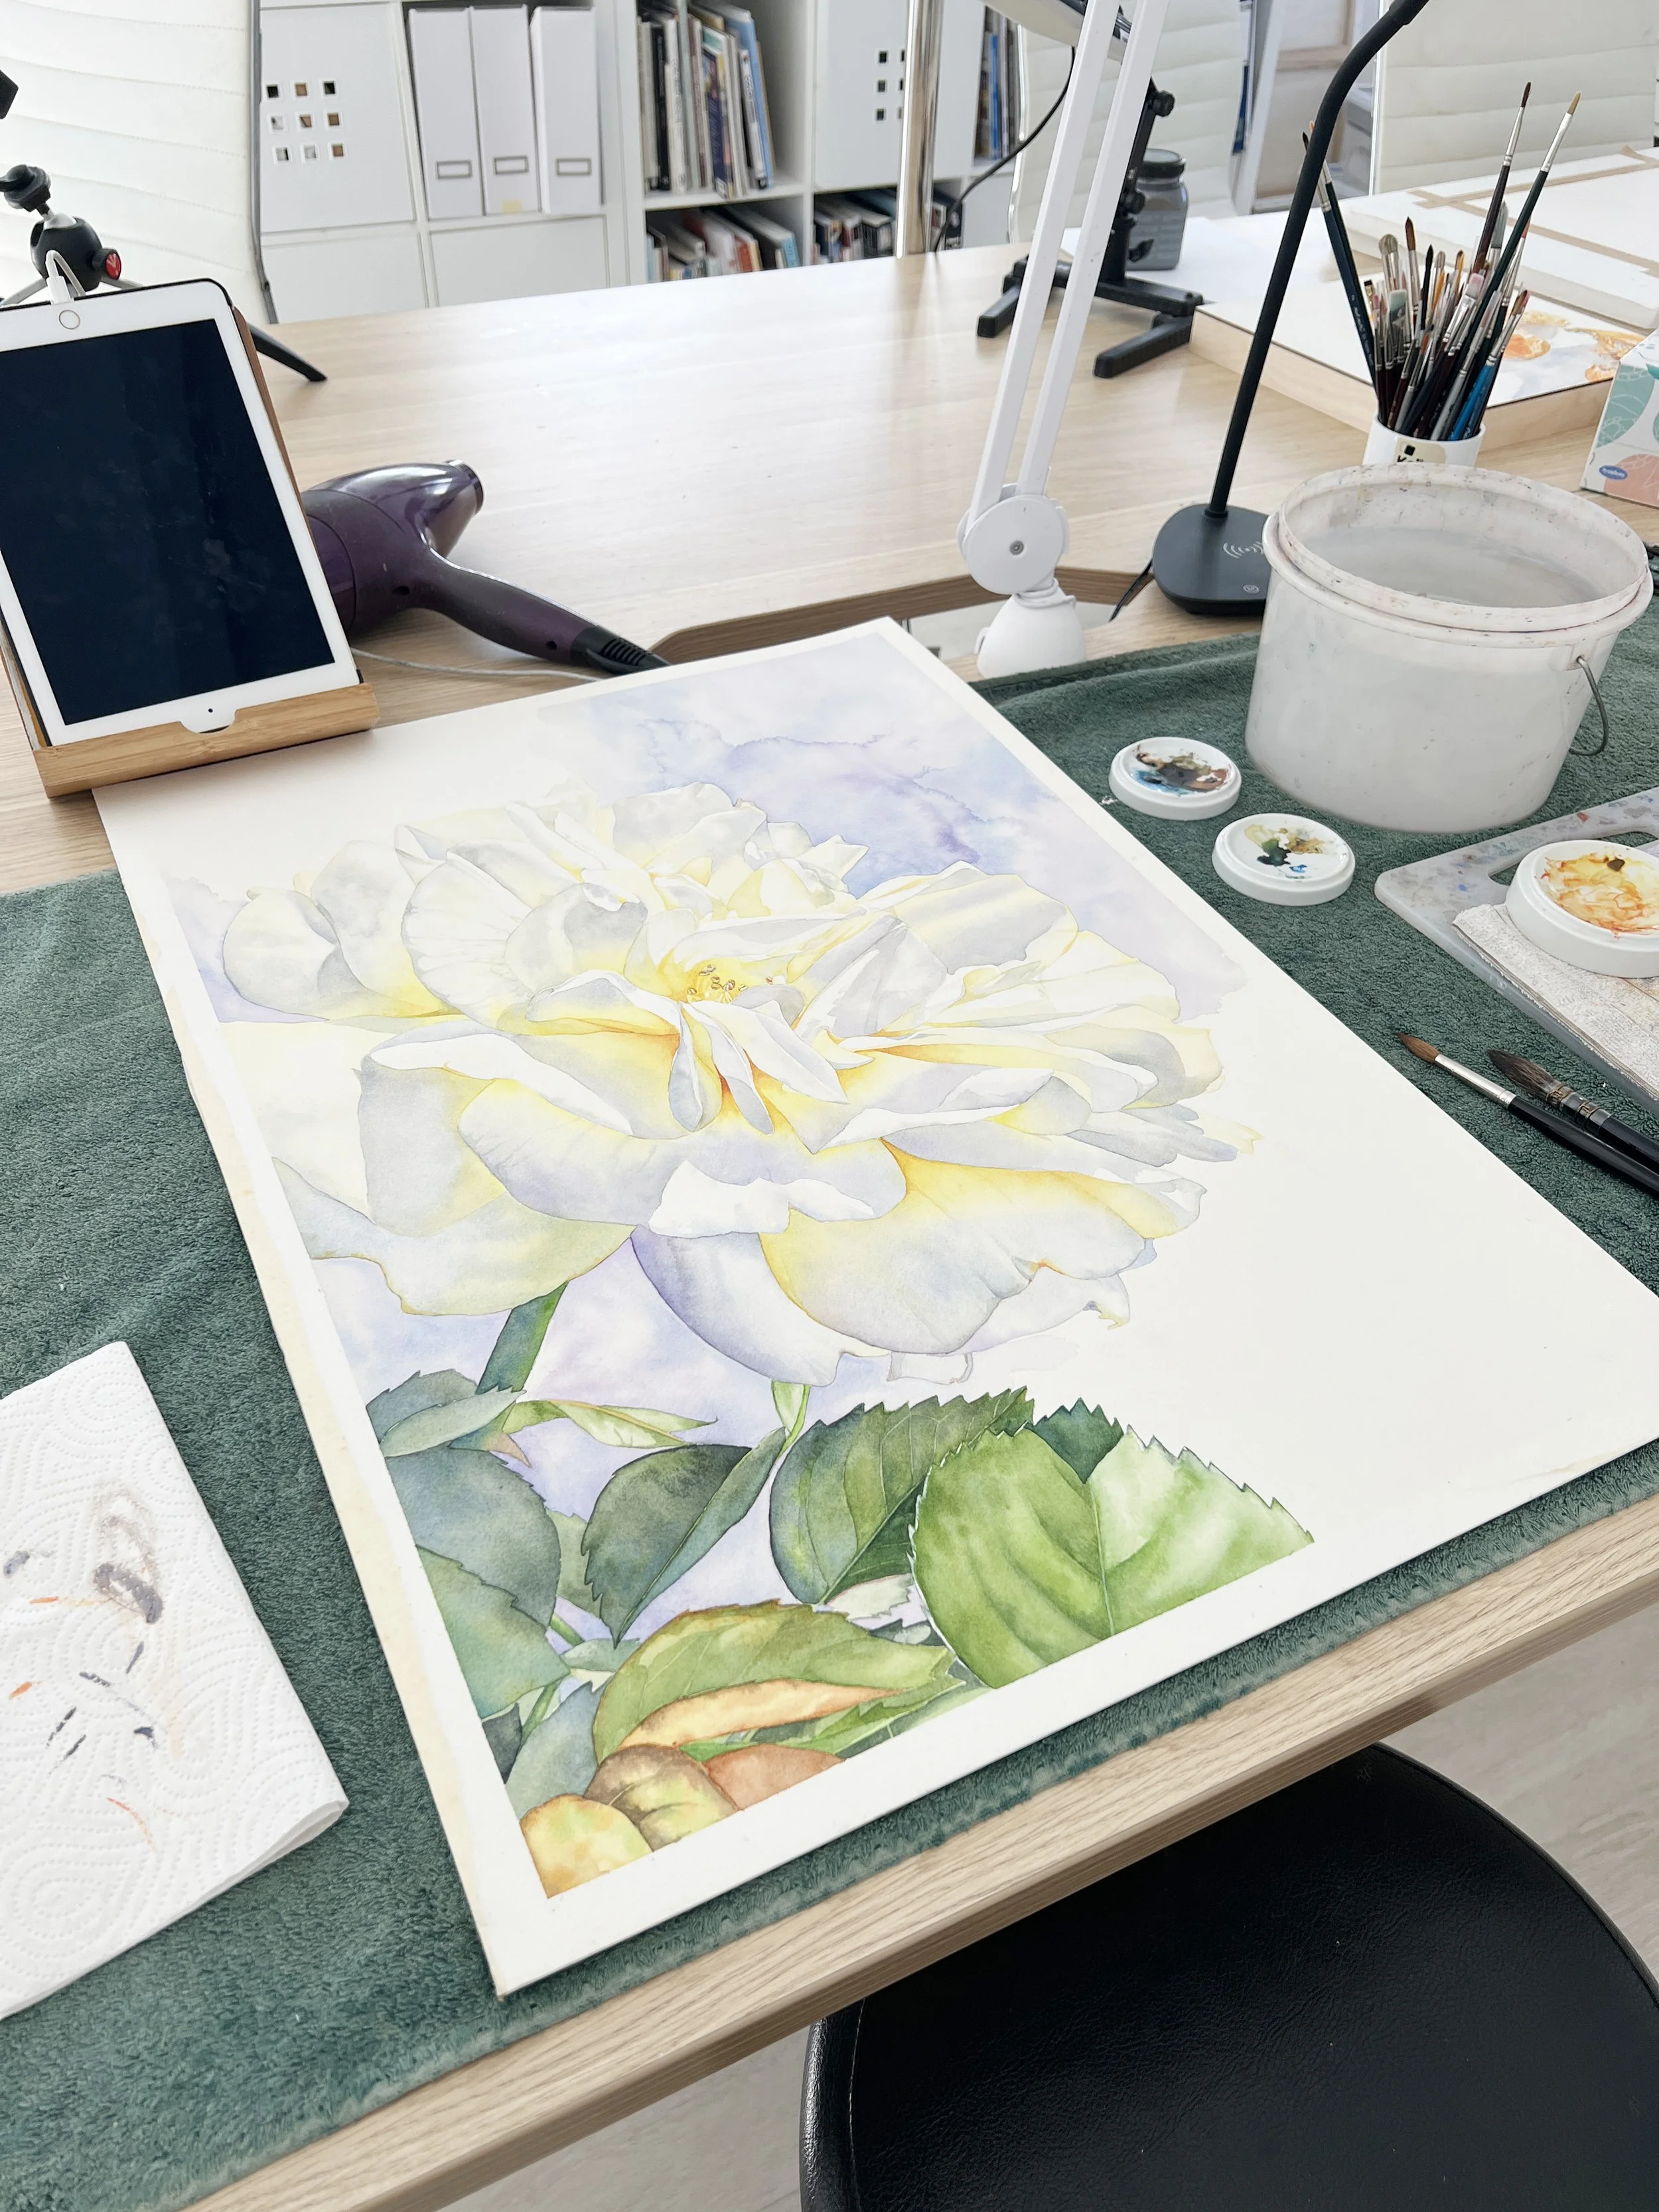
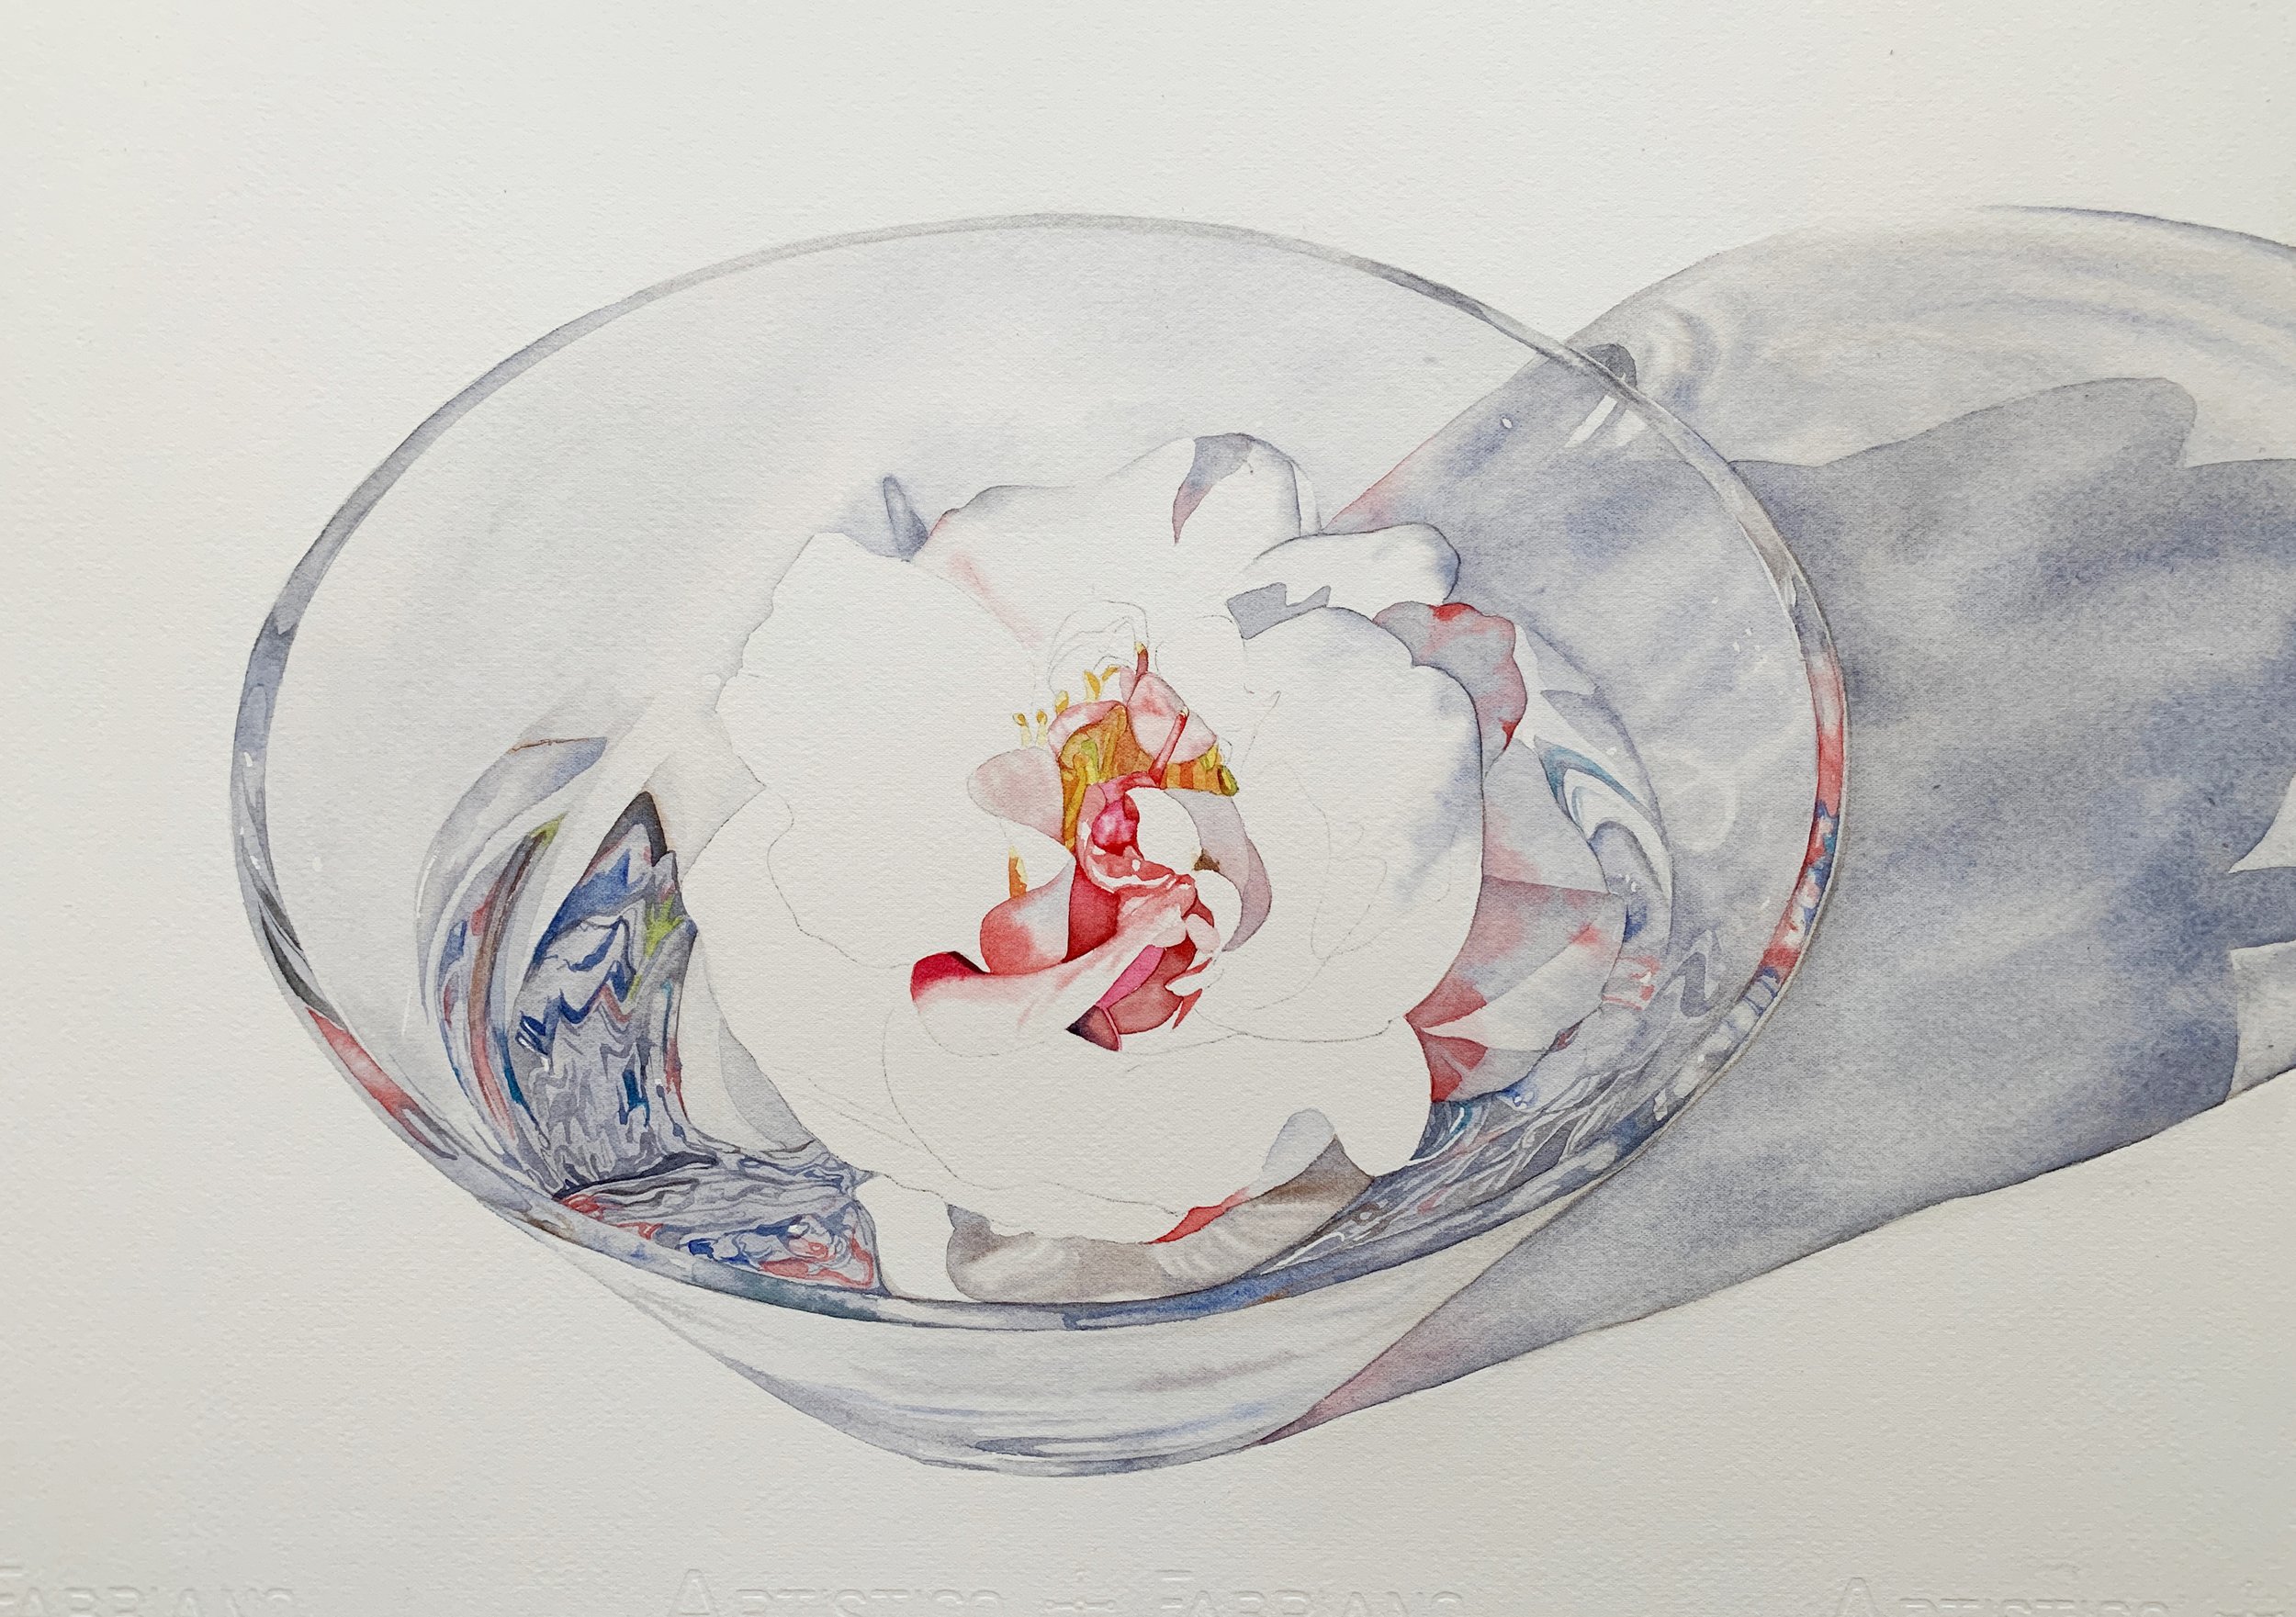
Stage 1 of the painting
My line drawing was fairly detailed because I wasn't sure how much guidance I would need when I started painting but as I progressed, I realised that a simpler line drawing would have been sufficient for the reflections in the water.
I started by painting a few of the lightest areas with masking fluid and left them to dry.
Then I used the grey I mixed to paint the cast shadow on the right-hand side, applying it with a large mop brush using the wet-on-wet technique. Once that dried, I painted the large grey shapes inside the bowl, varying the depth of colour. I also added some Winsor Red in a few places where I noticed red in my reference photo. At this stage, I focused on capturing the key shapes broadly and wasn't ready to add details yet.
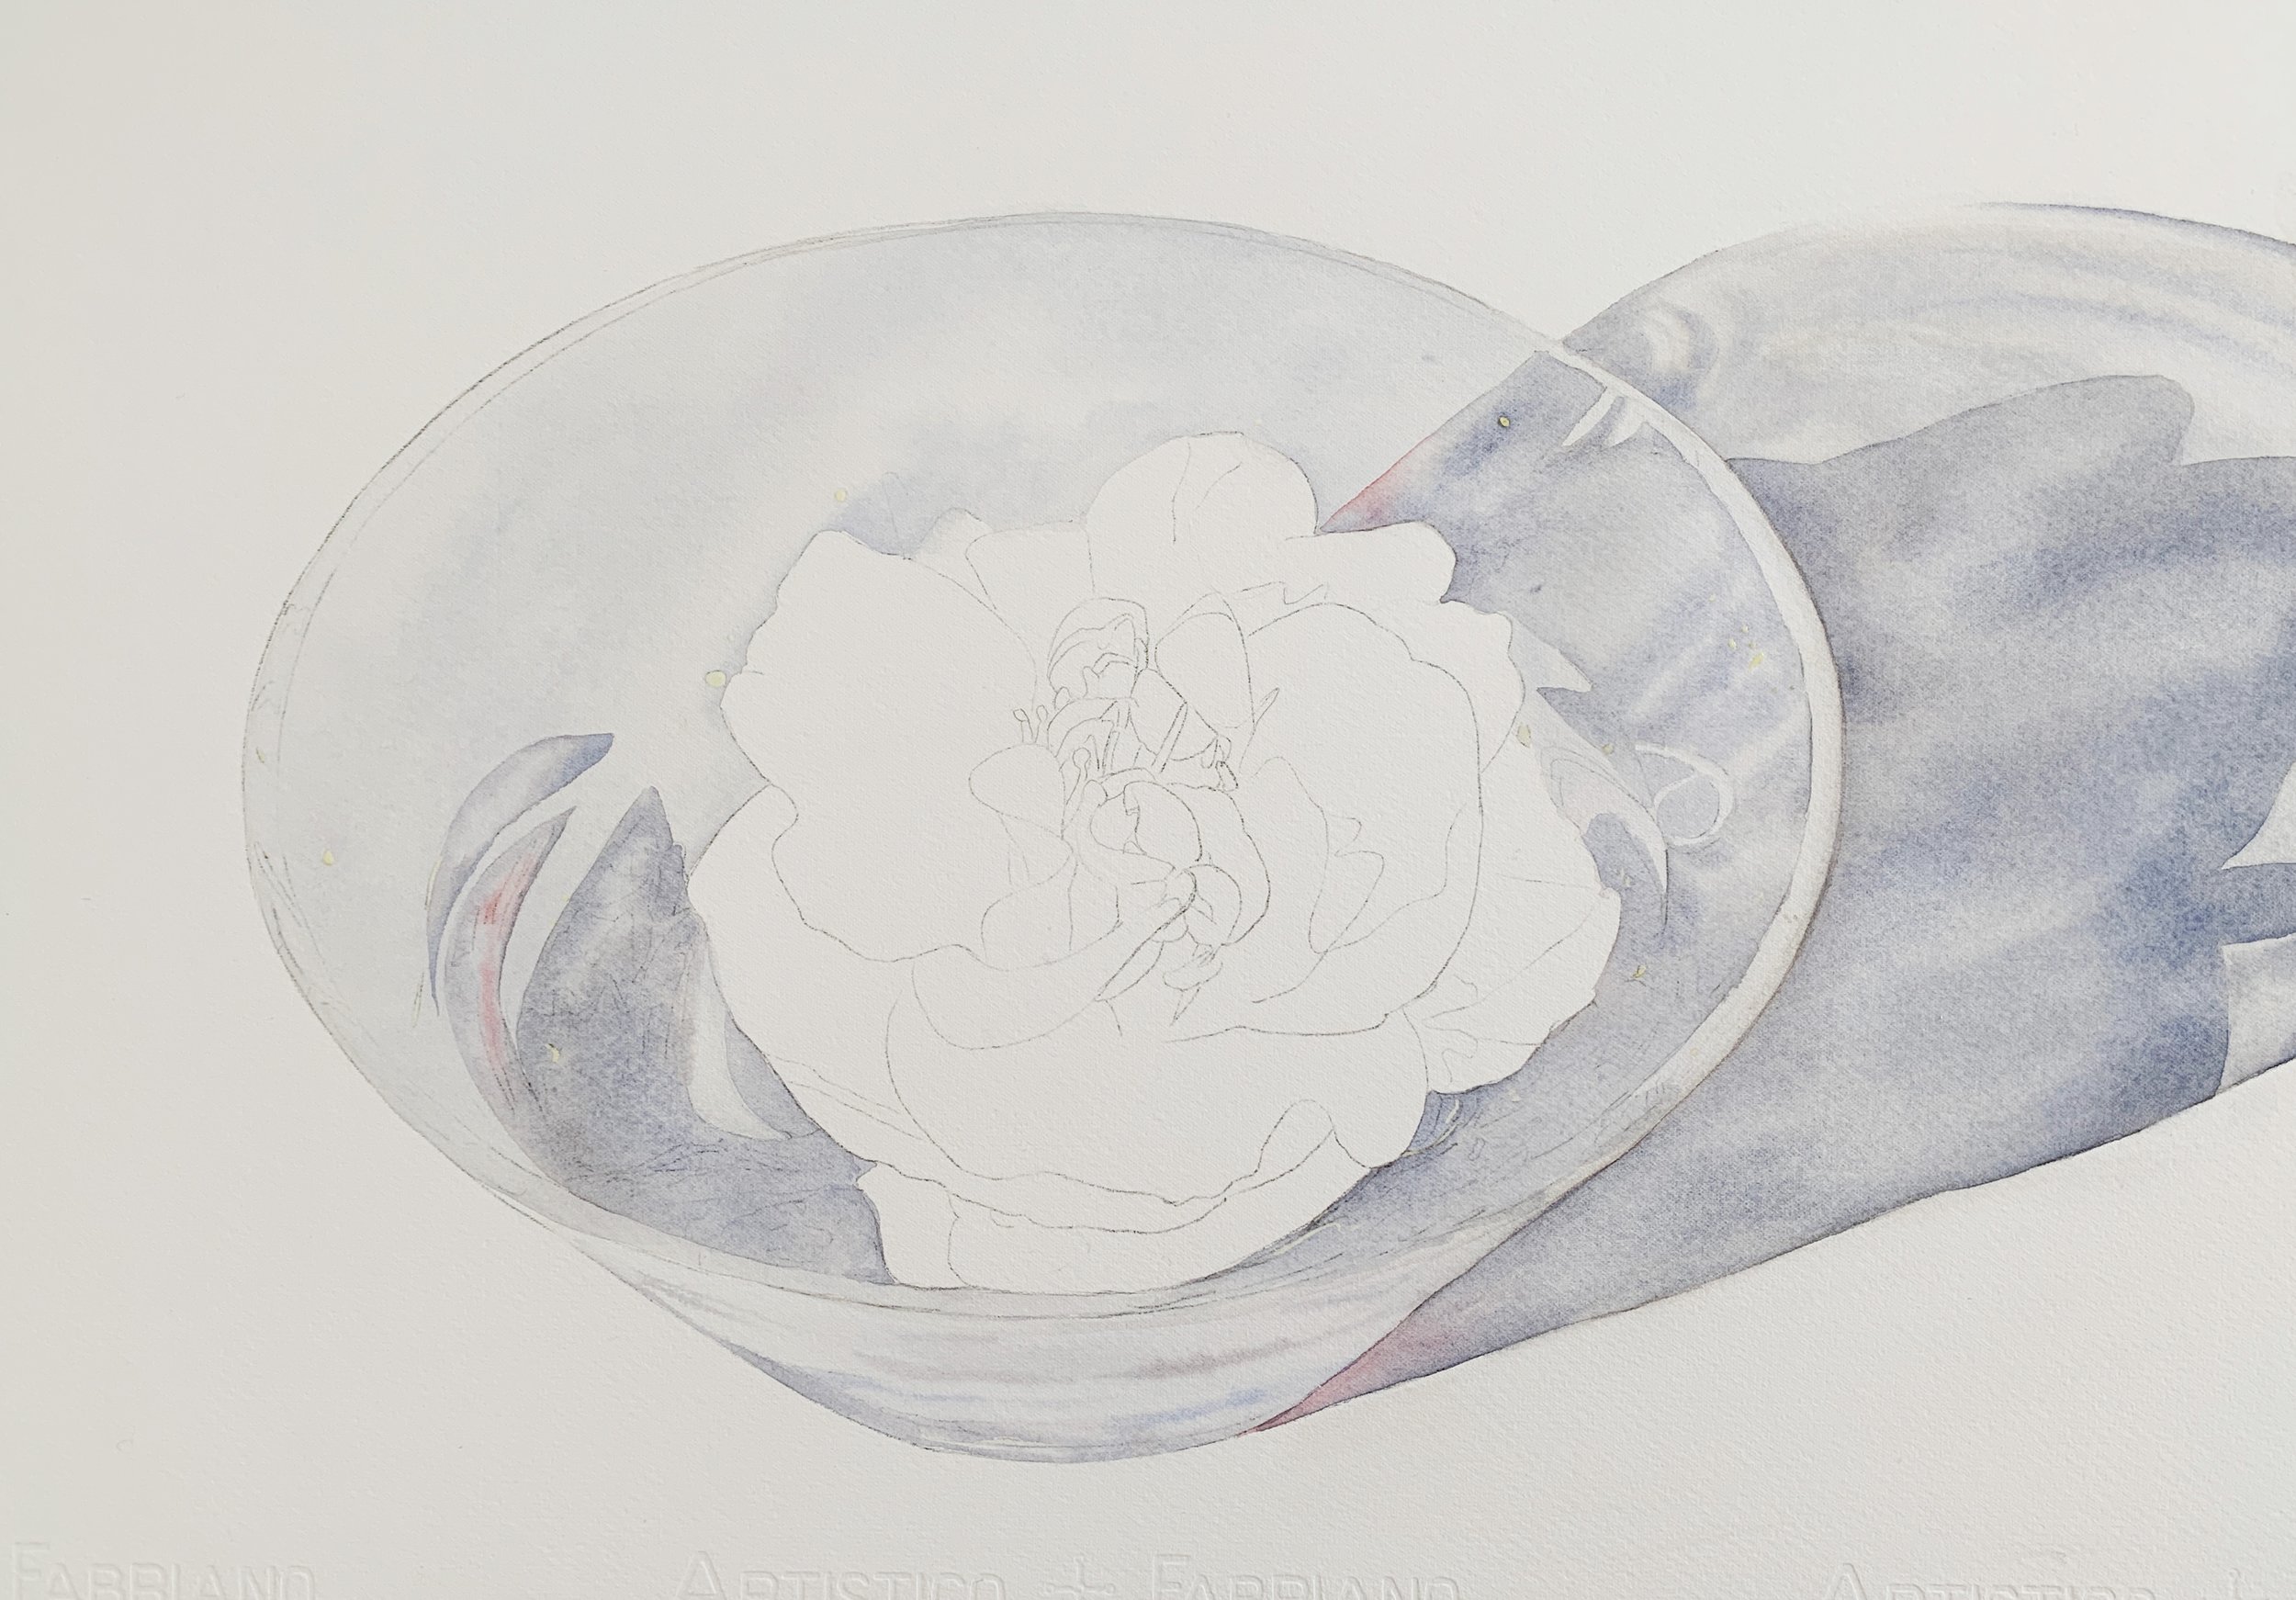
Stage 1 of the watercolor painting
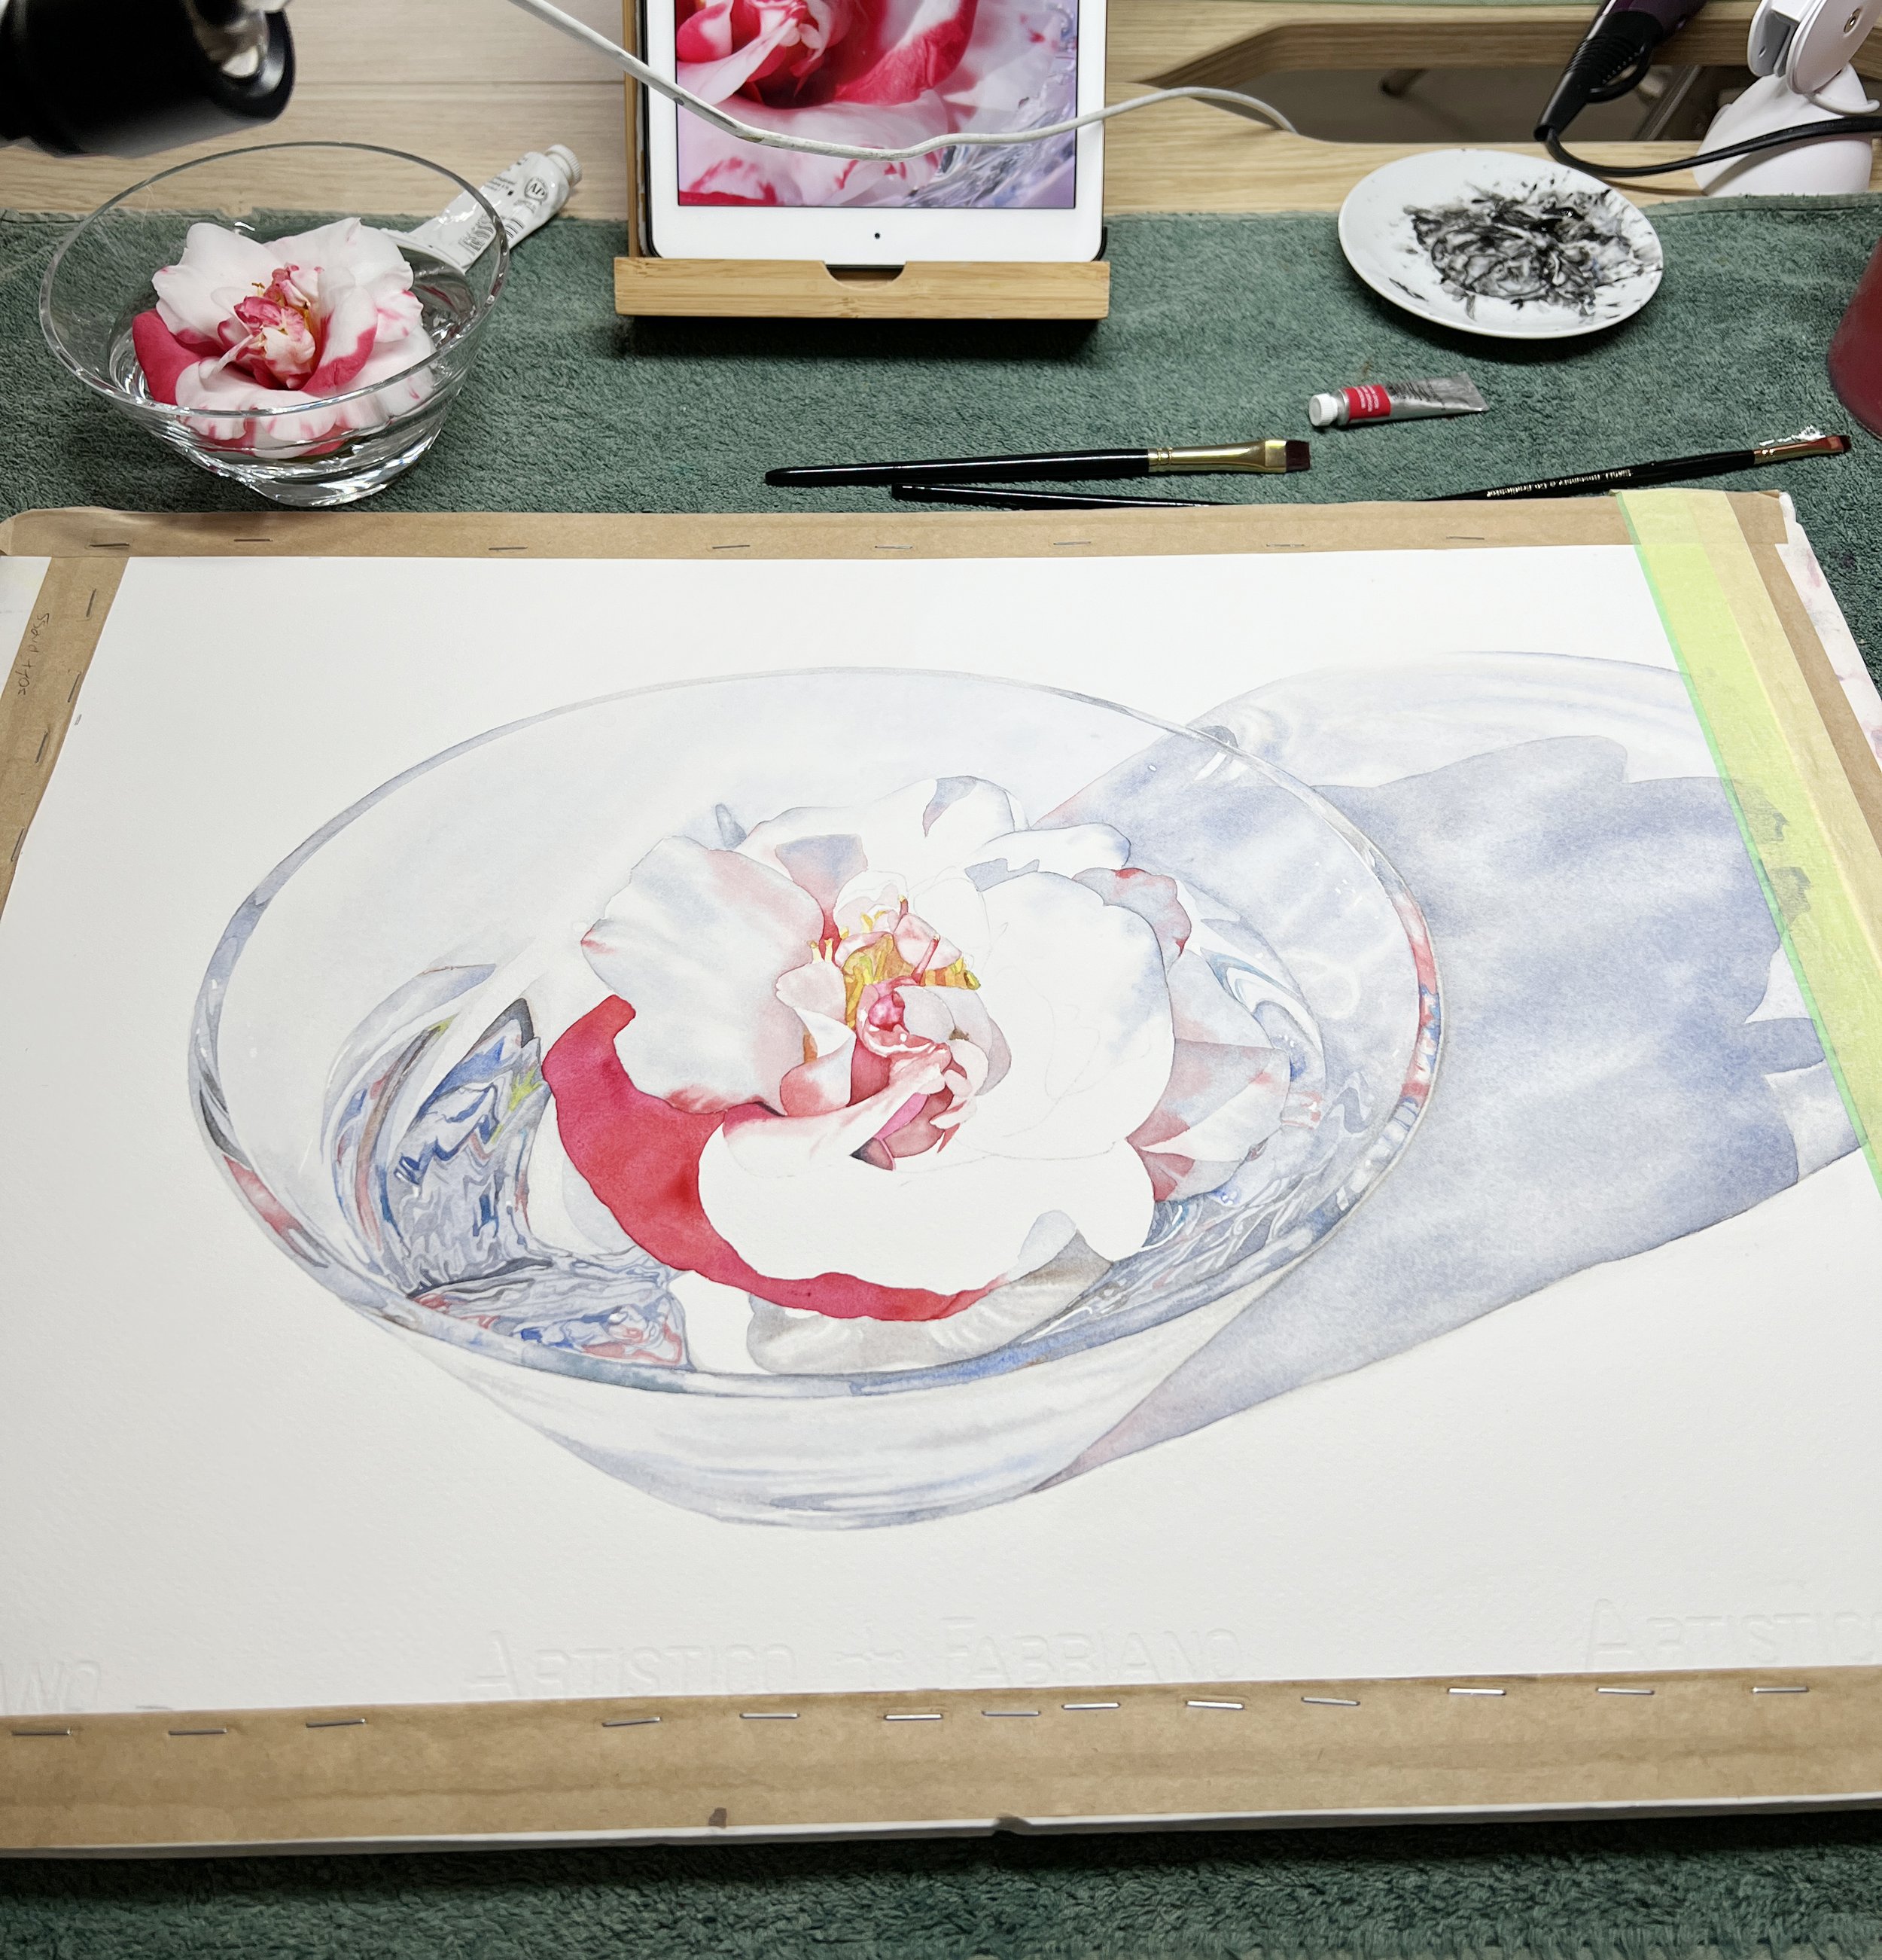
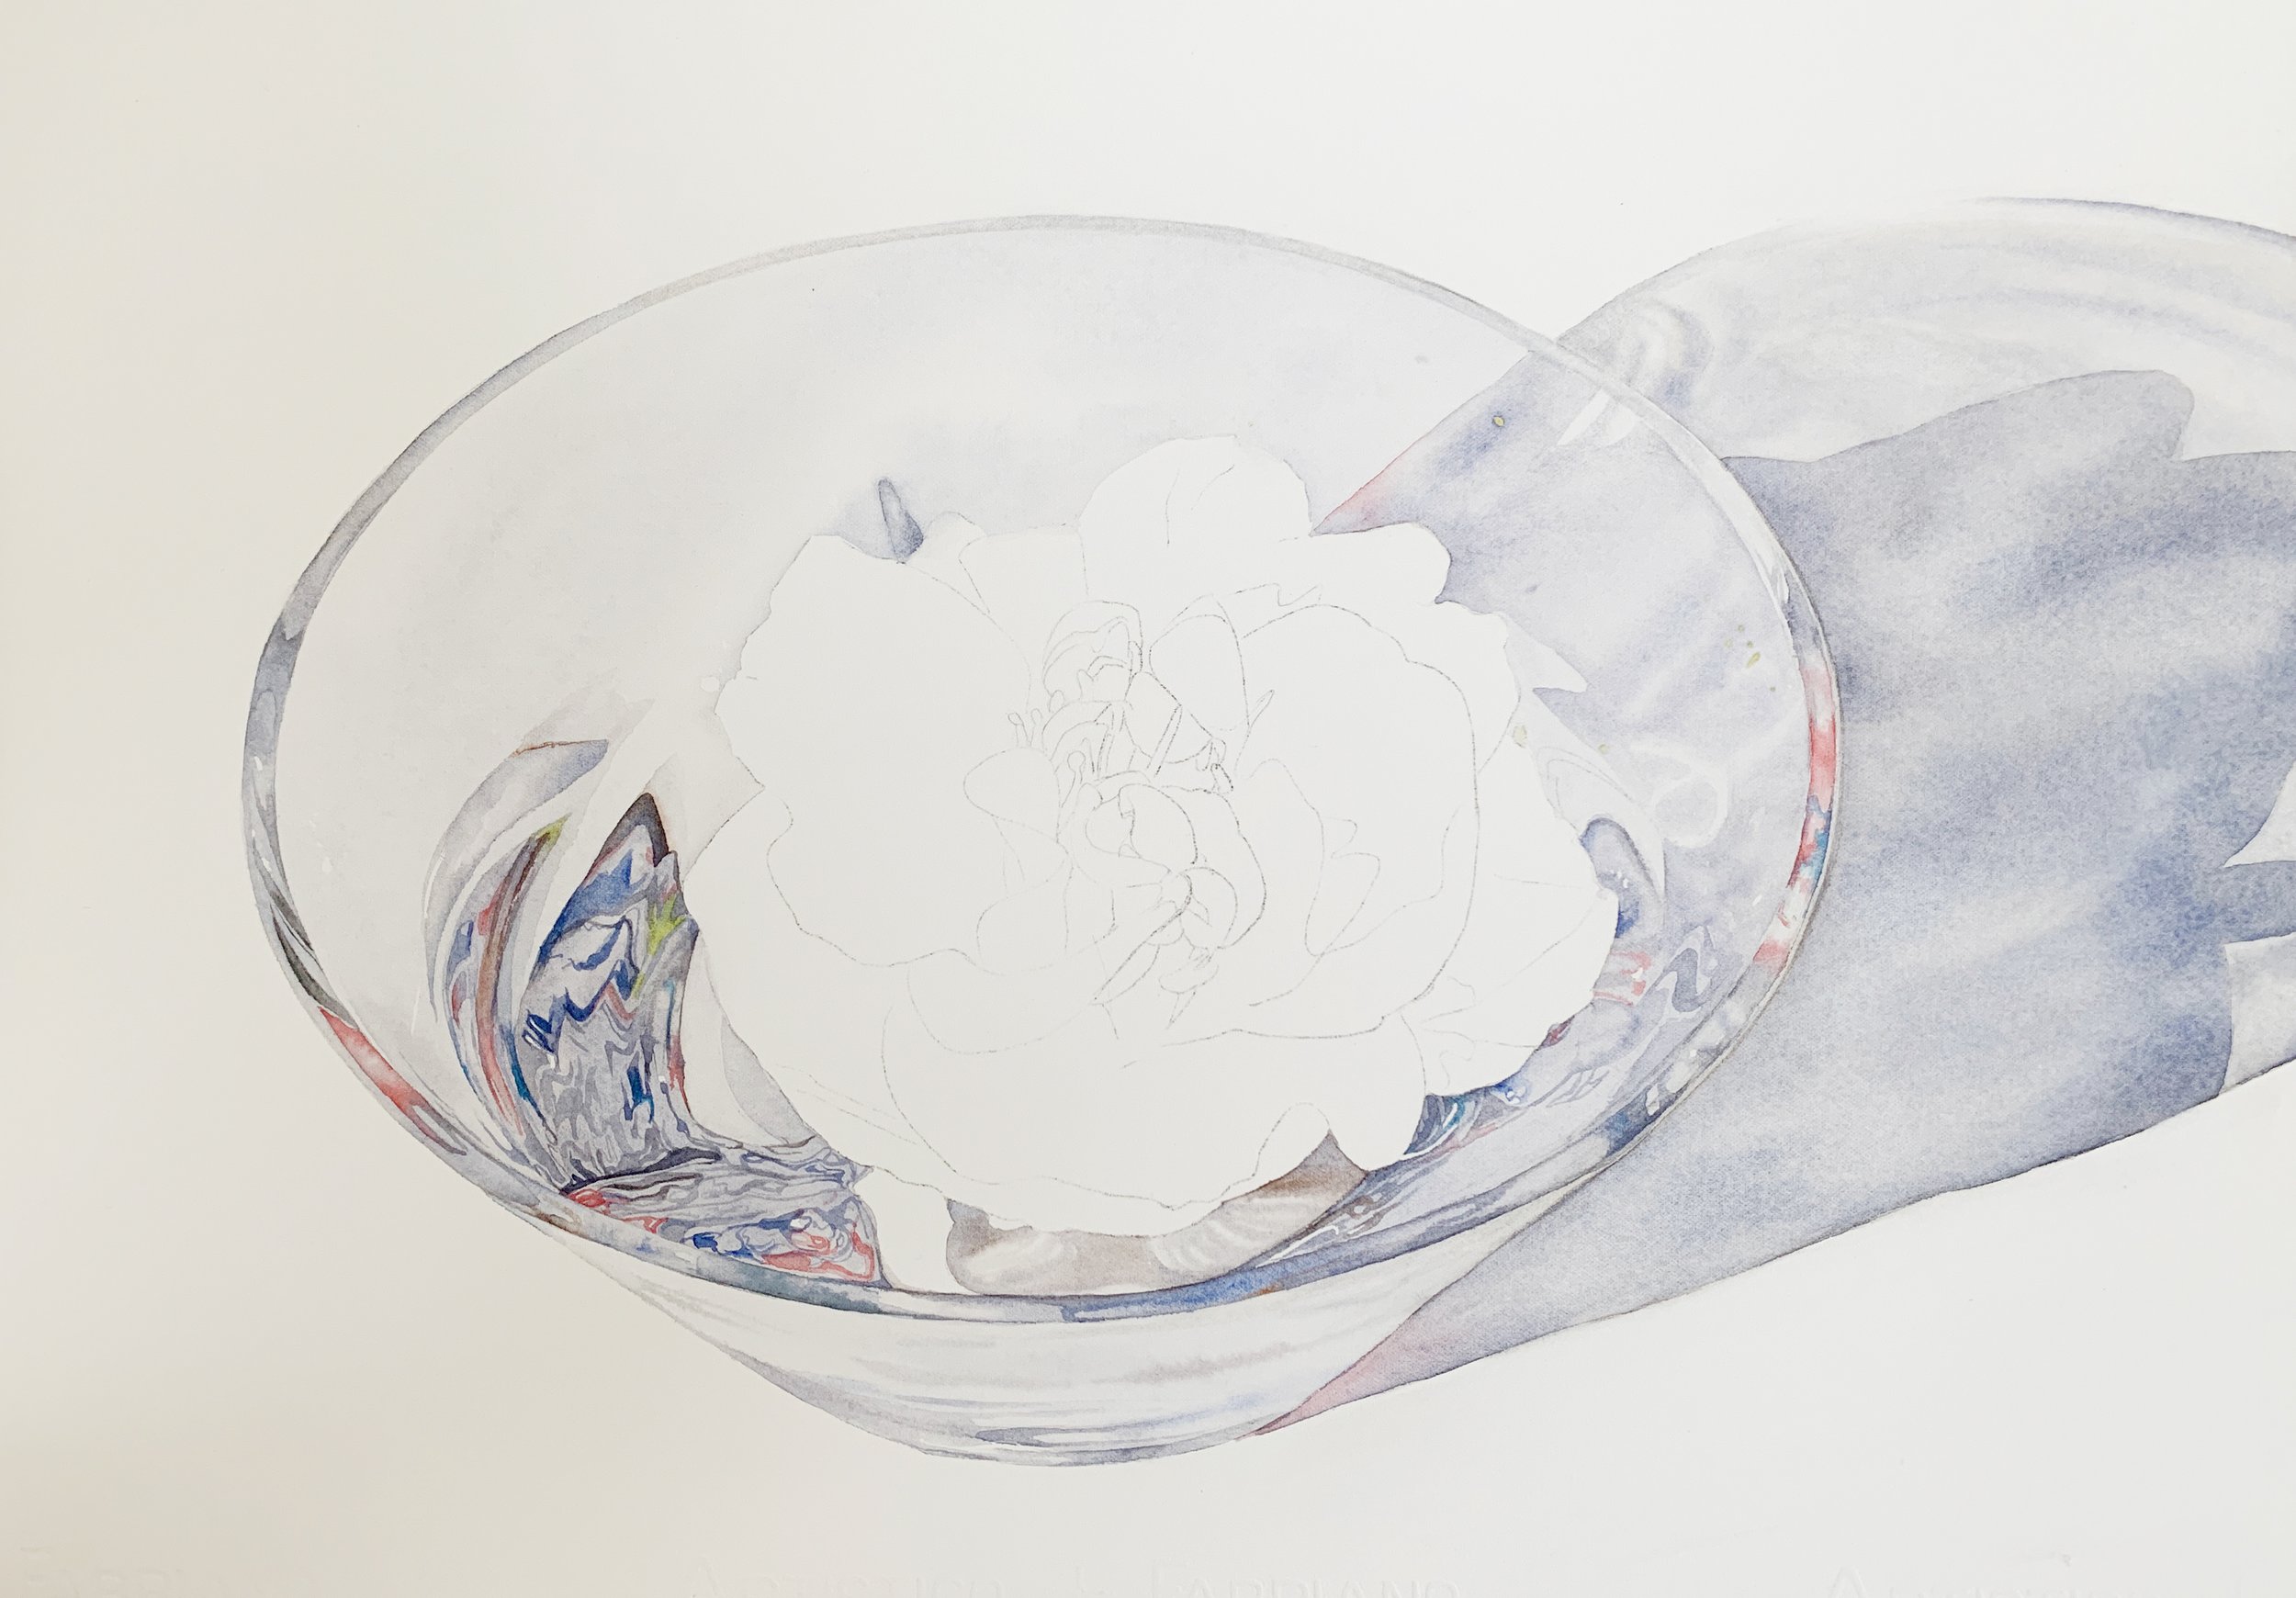
Stage 2 of the painting
Once I had painted the large key shapes, I focused on the reflections in the water. Using smaller brushes and working mainly wet on dry, I used French Ultramarine, a mixture of French Ultramarine and Burnt Sienna, and Winsor Red. I also noticed some green reflections in the water, so I mixed French Ultramarine with Winsor Yellow to capture that. I closely studied the reference photo and I tried to paint the reflections as accurately as possible. I also used those colours to start painting some of the reflections that were around the rim of the bowl.

Stage 2
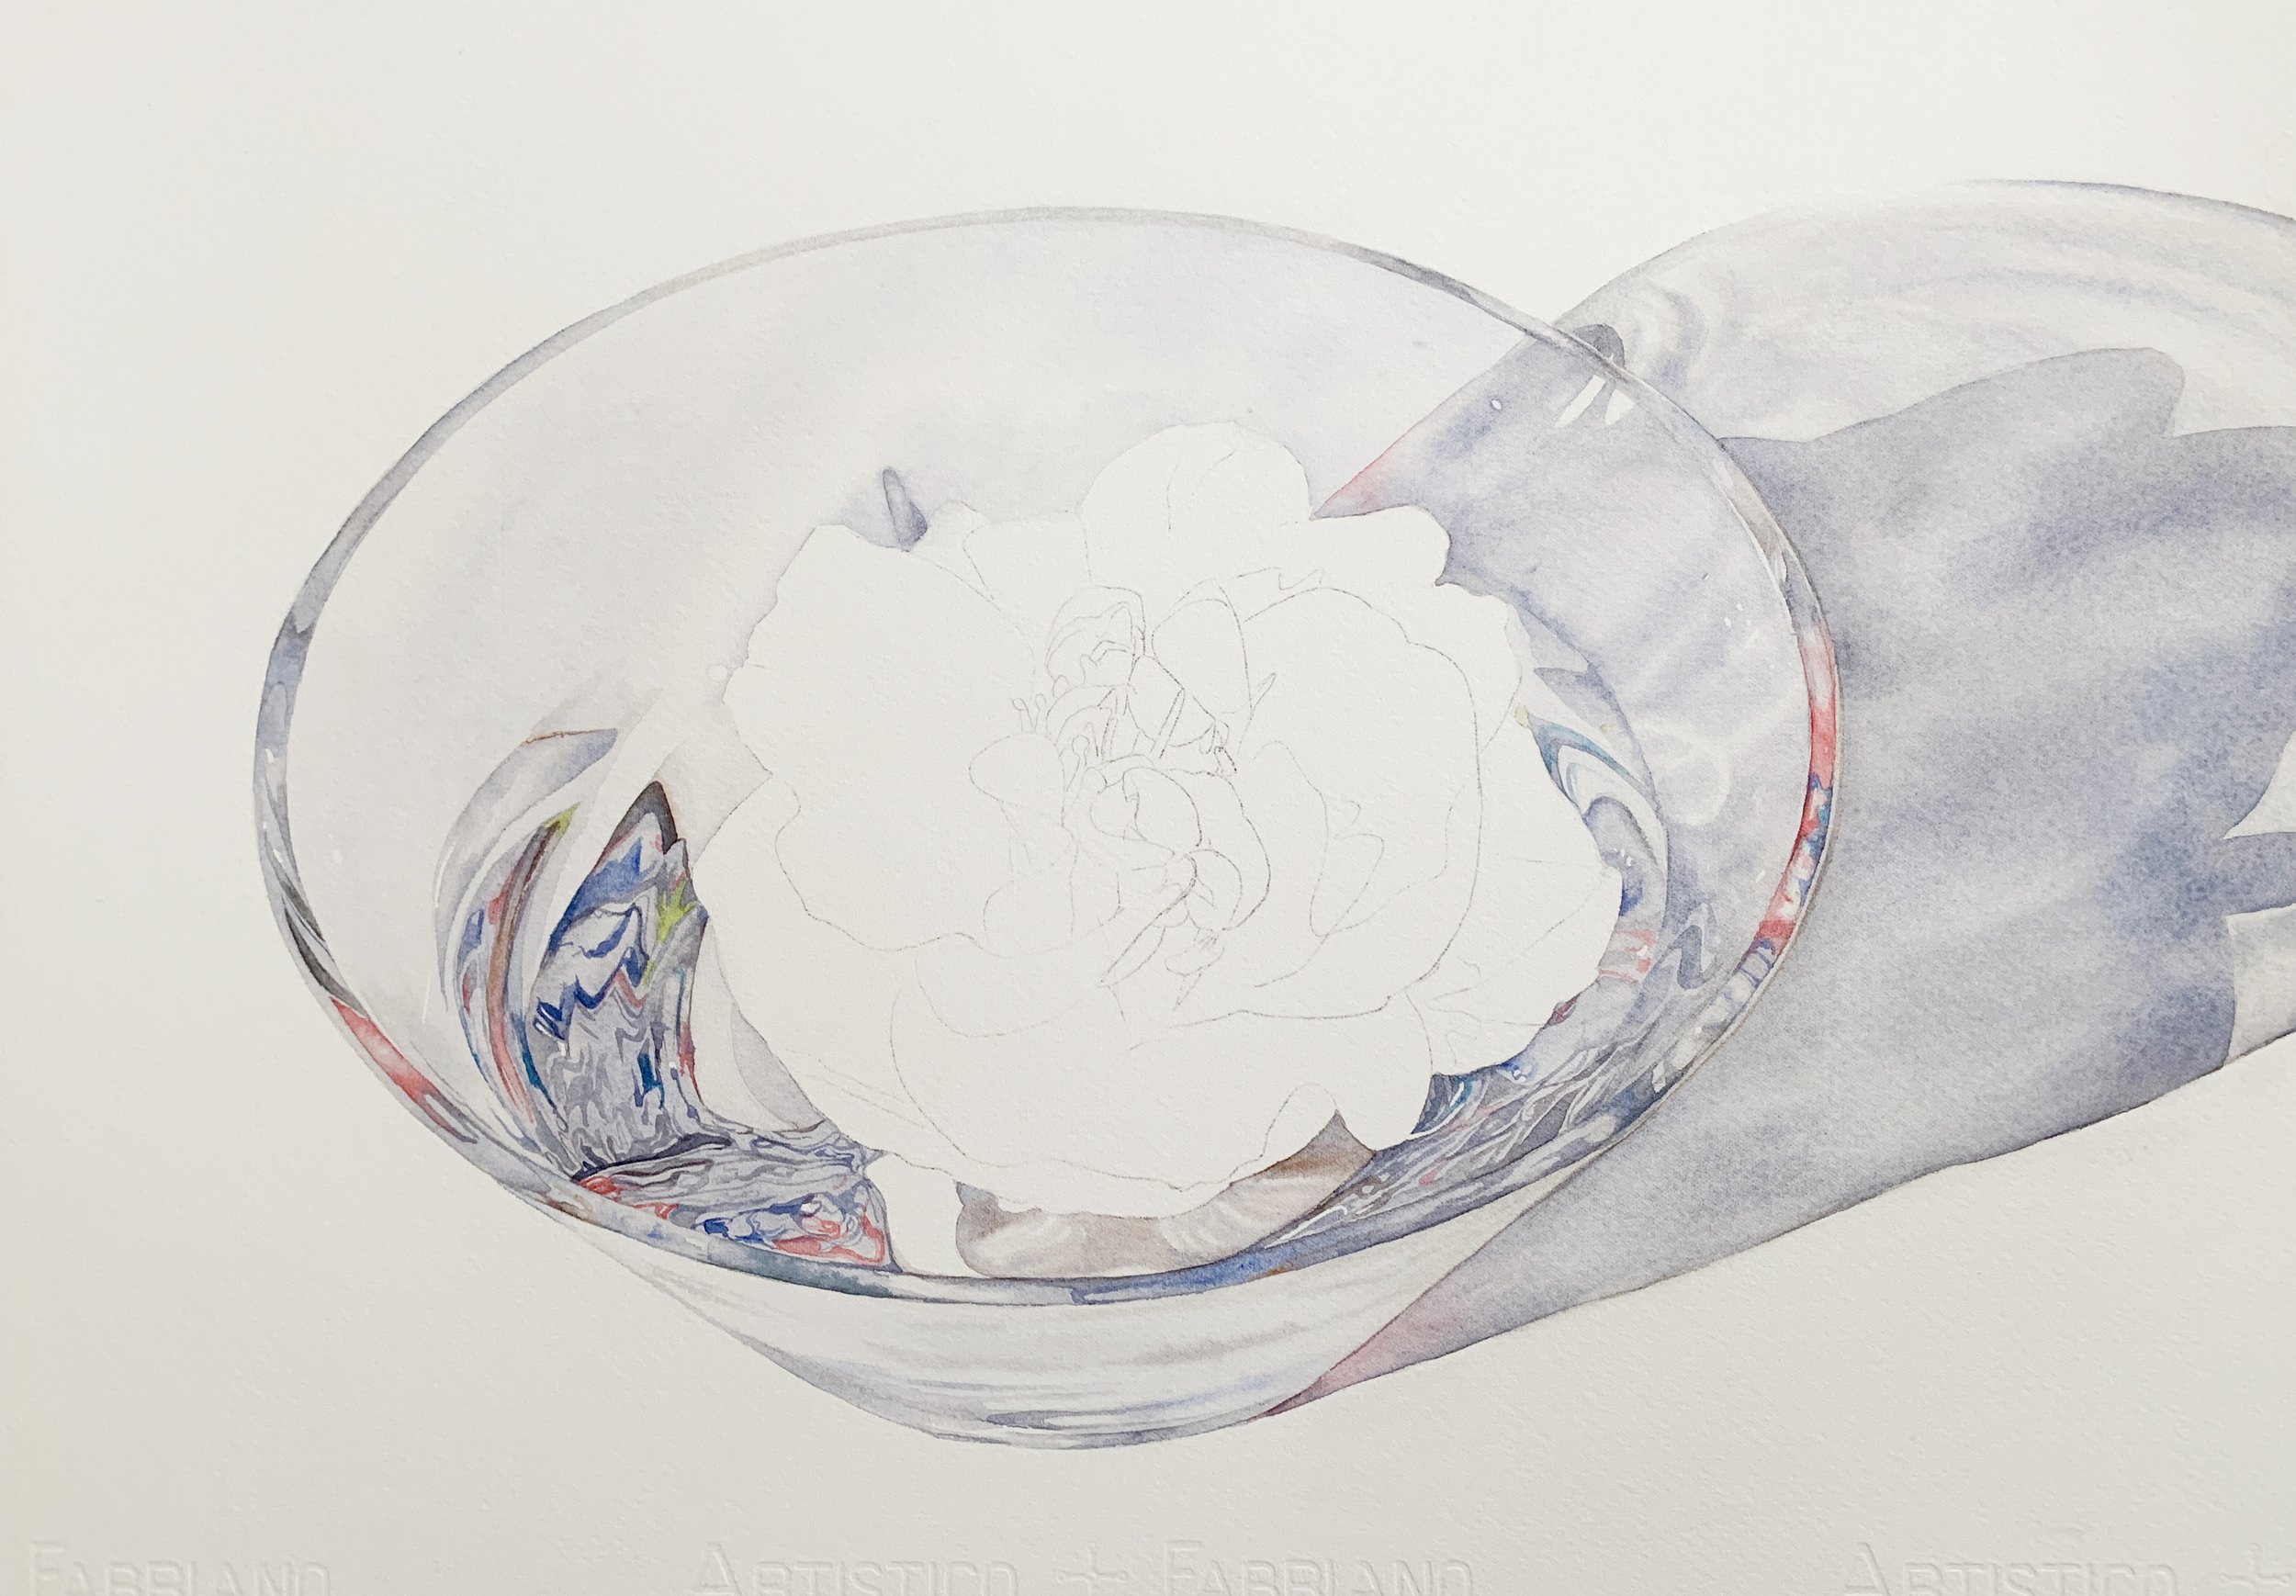
Stage 3 of the painting
Next, I moved to the other side of the bowl to paint the water there. Although I initially referred closely to the reference photo, I eventually stopped trying to replicate the reflections exactly. It was too confusing and I was gaining confidence. I felt assured that the painting was coming together well, which allowed me to relax a bit.
Stage 3
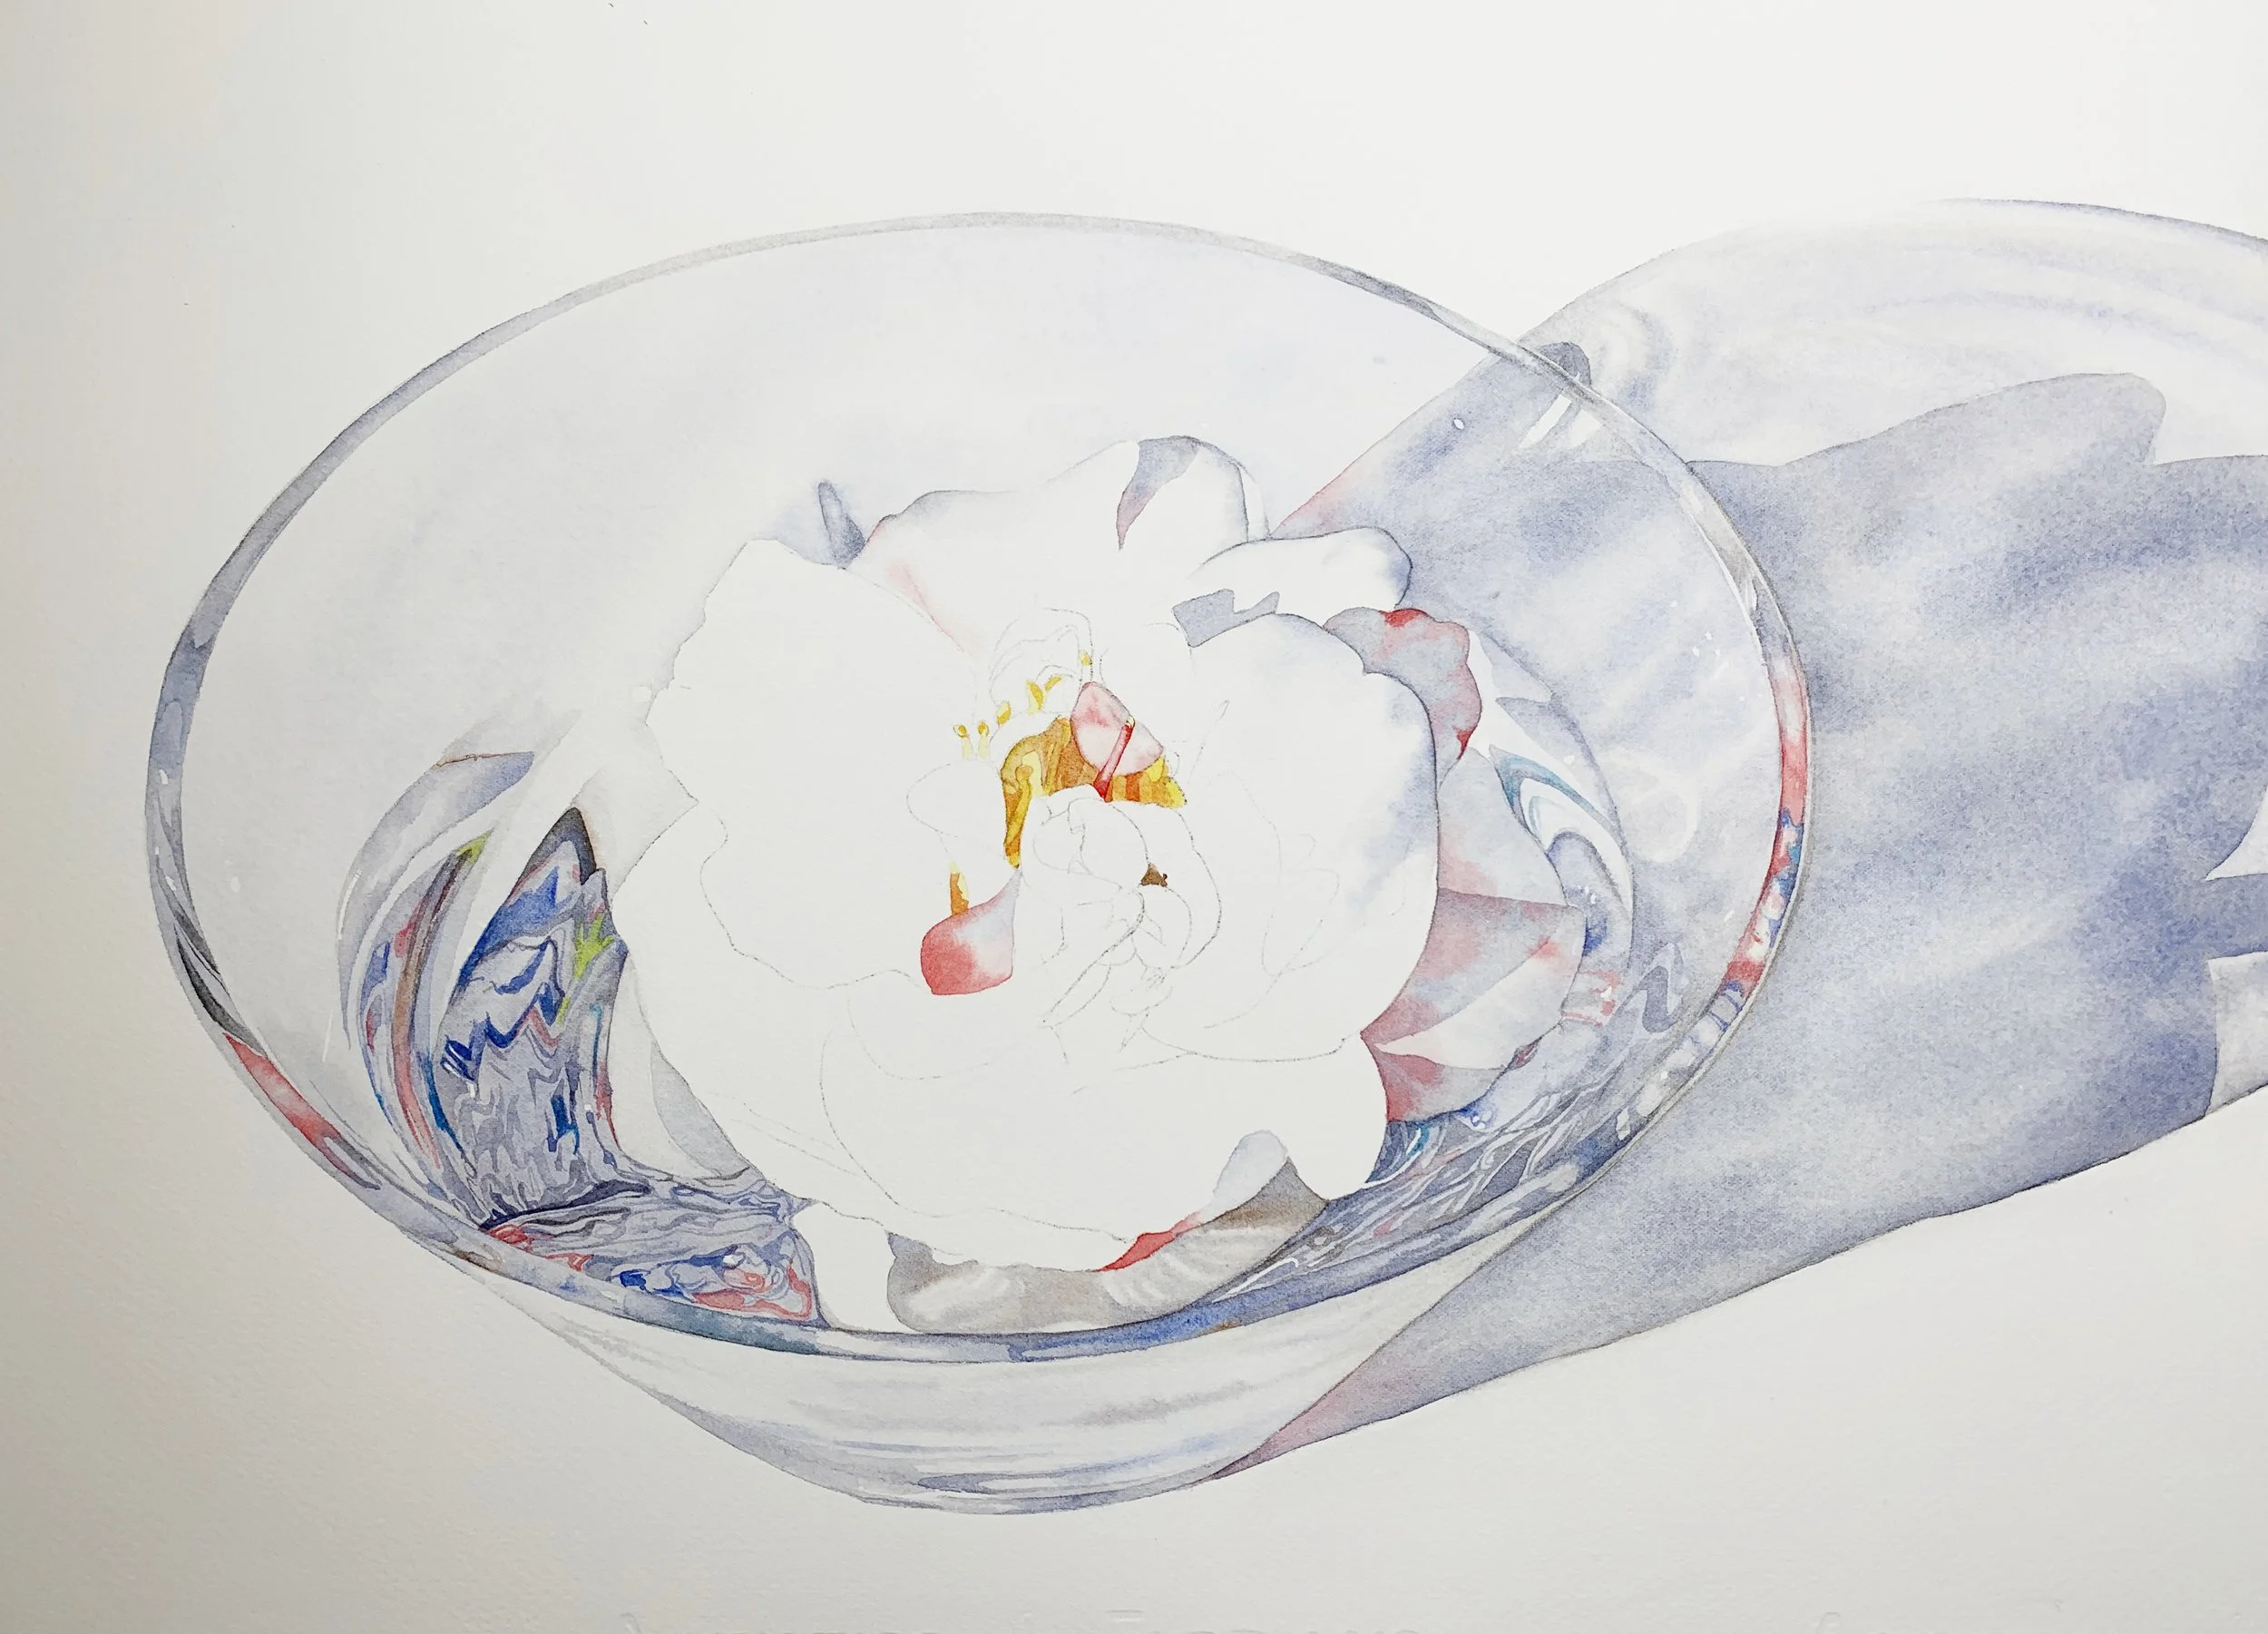
Stage 4 of the painting
Once I painted all the reflections in the water, I went back to my reference photo for a closer look. I made a few adjustments to the reflections and emphasised the edge of the water on the right side of the bowl. By this point, the painting had taken me almost all day, so I decided to leave it and come back to it the next day with fresh eyes and renewed energy.
Stage 4
Stage 5 of the painting
The most difficult part was behind me. Now I could relax a little and paint in the Camellia.
Stage 5
Stage 6

Stage 7

Finished painting.
What I Learned
Keep My Colours Clean: Avoid overworking the painting. The first layers in watercolour are the freshest, and too much fussing can make the painting look overworked.
Use the Reference as a Guide: There's no need to follow the reference photo precisely. Allow yourself to express your creativity.
Let the Brush Dance: Avoid being restricted by too many drawn lines in the detailed part of the water. Let the brush move freely over the paper.
Trust Yourself: Have confidence in your skills and instincts.
Take Your Time: Enjoy the process of painting. It's not a sprint; it's more like a scenic walk with lots of coffee breaks - so have fun and maybe bring snacks.
Painting this piece was a wonderful journey that brought back fond memories of my nan. Her simple yet beautiful tradition of floating camellias in a crystal bowl has always stayed with me. I hope this painting and its story inspire you to find beauty in your memories and let them guide your creative process. Here's to my nan, whose love and creativity continue to inspire me every day.
Prints of this painting are available in the shop.
If you are interested in learning to paint in watercolour, I have over 200 online, voiced over watercolour tutorials for all skill levels.